Before I enrolled in architecture school in the late summer of 1991 (has it been 32 years?), I received a long list of “required tools + supplies” from my university. As it turns out, I spent a lot of money on things I never used. As architecture schools greet new students this fall, I thought it would be fun to revisit that list of “must-haves” after having practiced architecture for 30 years. What’s stood the test of time in my practice? If I had go to architecture school again, this is what I’d bring.
Storage
I’ll admit, I’m a sucker for everything Yeti makes and their GoBox 30 is no exception. It’s just about perfect for studio storage with an included removable tray and a center divider to subdivide the 11”W x 18”L x 9” interior. Left undivided it can handle all the irregularly shaped tools and supplies we’re about to fill it with. It’s large enough to hold all your supplies, but it’s small enough that it’s still portable. Just under the lid there are three mesh pouches, Yeti calls this the ‘pack attic’ which adds another layer of organization to the box for storing a tablet, a laptop and sketching tools. The lid has eyelets so you can lock it to your studio desk.
I know this will last a lifetime, but there are certainly cheaper options and you might opt for a tool chest or tackle box as a lower cost alternative; they just won’t hold quite as much stuff.

(pre)Design
Before we can begin design we start with a period called predesign where we understand the design problem and conduct research. So, first on my list is a camera to document existing site conditions, for precedent studies, travelogues, and later for documenting construction progress. A wide angle zoom lens is versatile enough to capture both exterior and interior spaces as well as details. I find using a camera improves my visual acuity, it sees things in a way I’m not able.

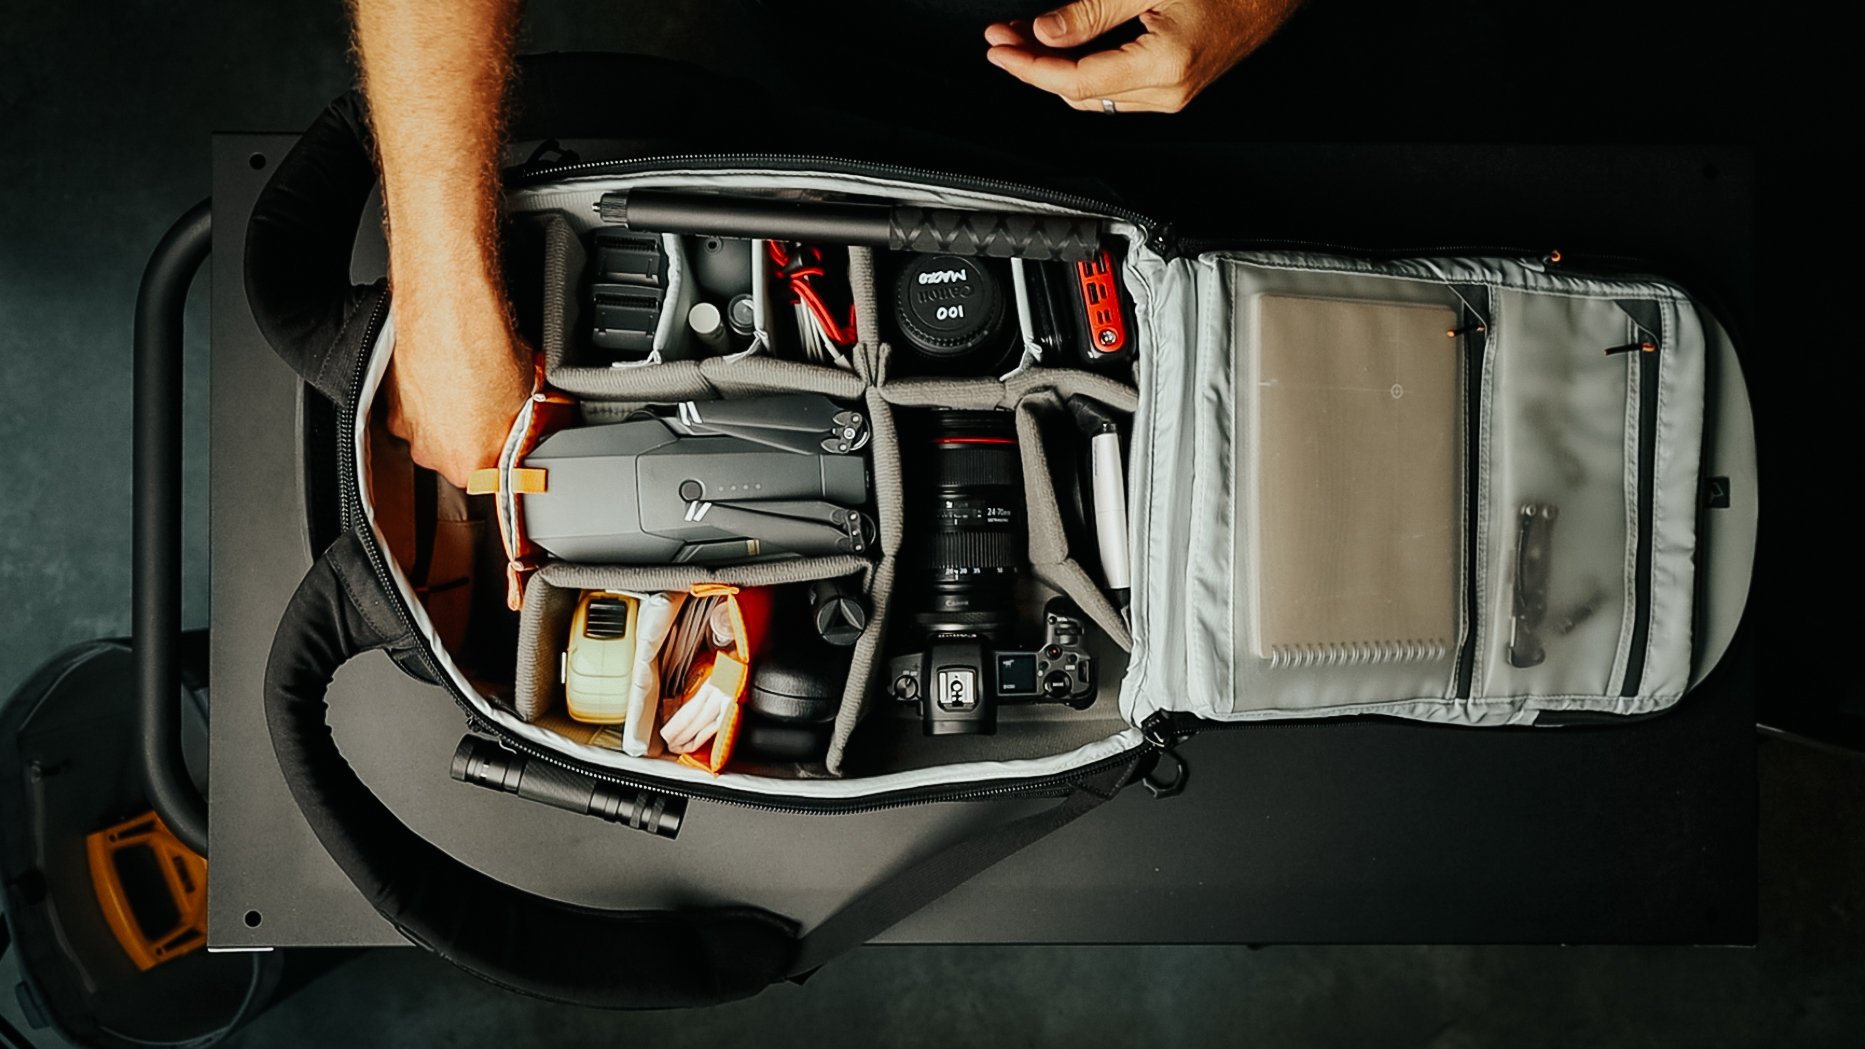
Next, a 25’ tape measure is a tool I use in practice every day. As I’m drawing I use it to gauge how tall or wide an element should be, to measure existing spaces and structures, I use it in client meetings to show mounting heights, and on-site to verify dimensions. Understanding scale and proportion are key skills we rely on in this profession, a tape will help you learn to become spatially and dimensionally aware.
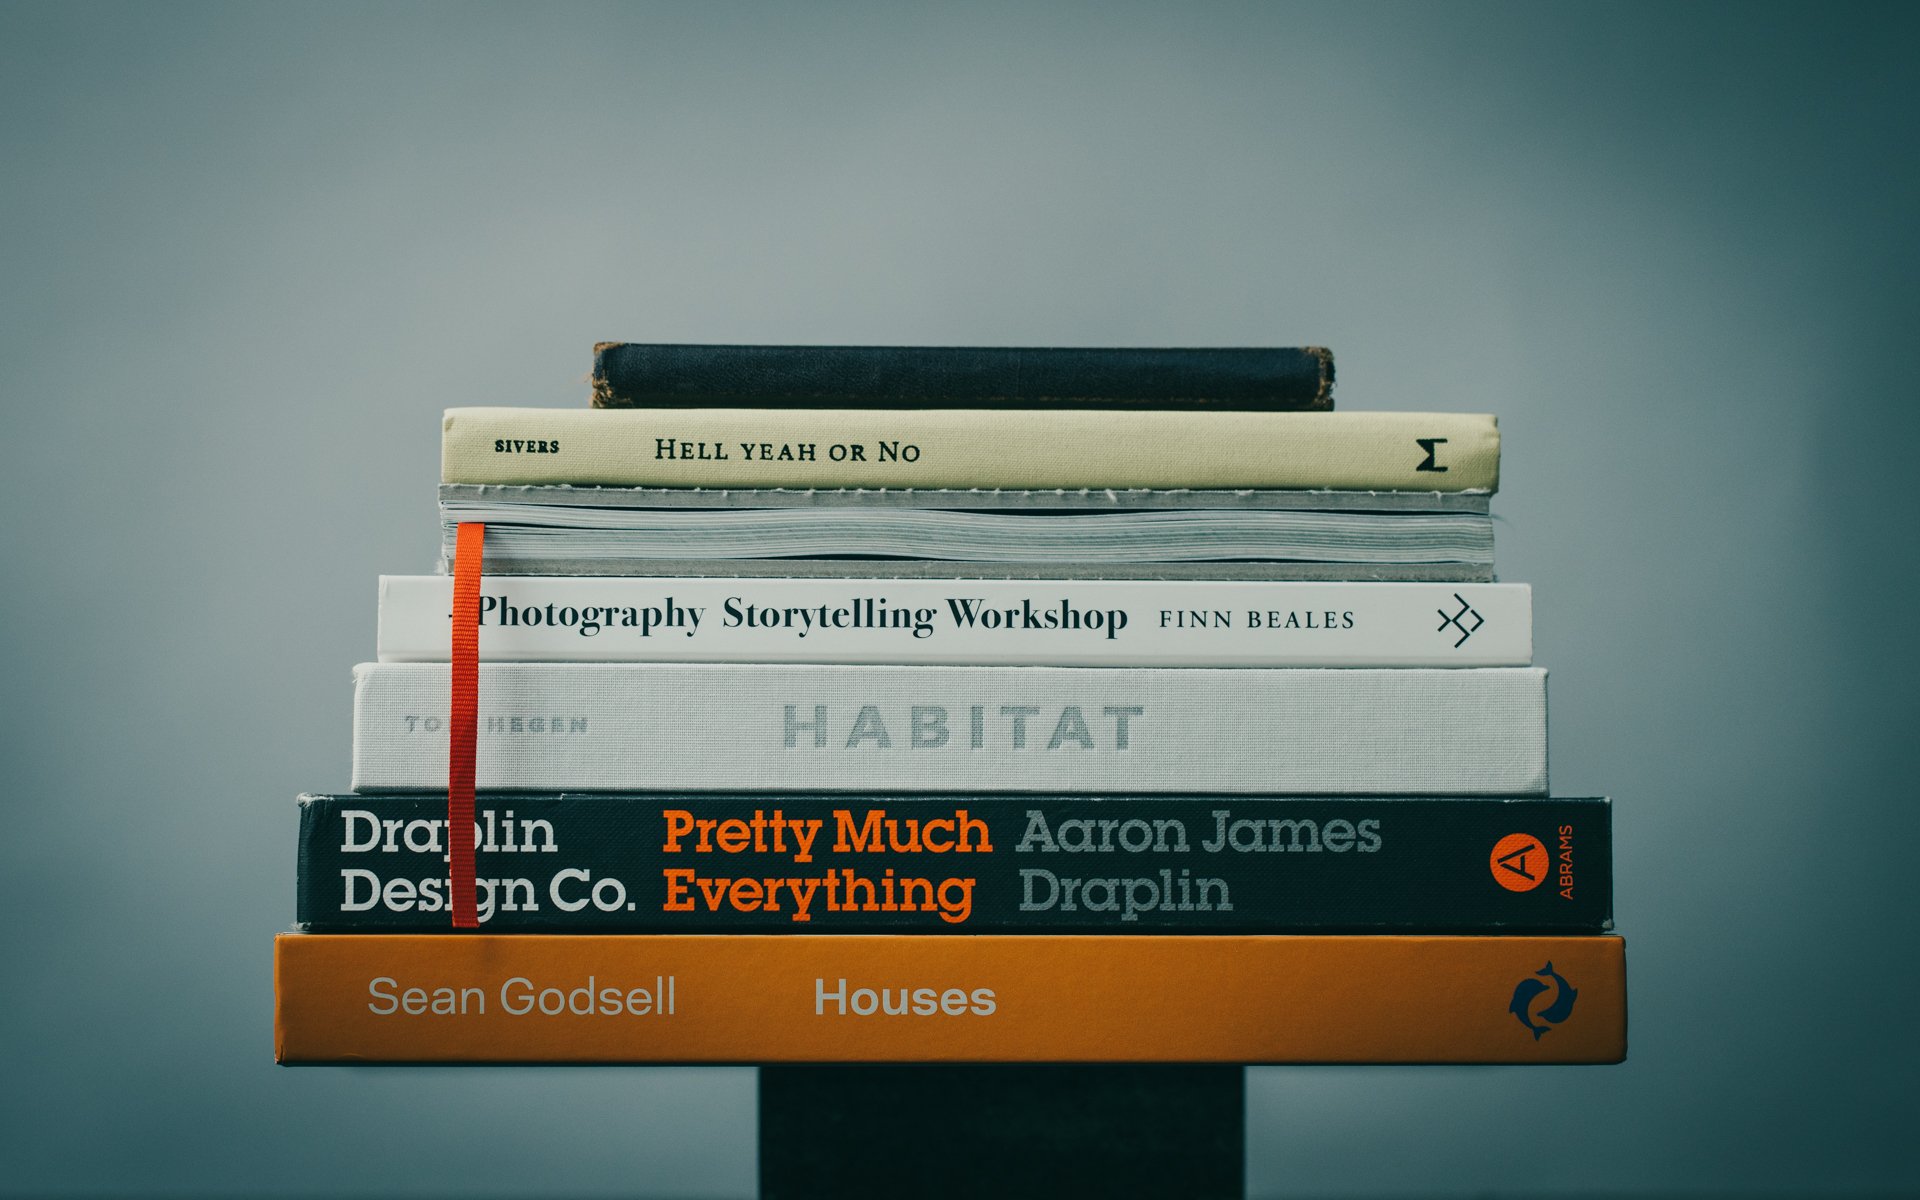
The essential reading and research in architecture school these days is all done digitally. But as you progress, you'll want to build a reference and an inspiration library. And I just like having physical books nearby as I'm designing, and I use them to reference details and standards during the design process.


Design
“Sketching is thinking,” as they say and initial concept development (for me) always happens in my sketchbook. You want a sketchbook that fits easily in your hands, something that's portable so you’ll always have it with you. I like a wire-bound one because it lays flat on the desk and choosing one with a grid allows you to sketch to scale by assigning each grid a unit of measurement.
Your sketchbook is where you document all of your ideas and of course, you'll need pens and pencils to do that. For ink, I use three pens: for thick lines I like the Pentel Sign Pen, for medium lines it’s a Sharpie Ultra Fine, and for thin lines, I like the Pilot Precise V7 and V5.
I prefer to sketch in graphite, the Kuru Toga remains my all-time favorite. It has a geared mechanism at the tip that twists the lead as you write so you always have a sharp point. Don’t forget to throw in some extra leads and some erasers. A small click eraser is great for precisely erasing things on the page.


If you want to add a splash of color to your drawings, it's nice having some colored pencils (I like Derwents) and markers for shading and shadow. Copic markers are the premium choice because they’re alcohol-based they allow you to blend on page. When you're choosing colors for all of these, choose things that match with architectural materials (wood, metal, glass, stone) or site colors (vegetation, etc.) - browns, greens, yellows, and blues.
I keep everything orgranized in a pencil case, my current favorite is made by Bellroy. The seaming allows it to lay flat and propped open on your desk, and the loop allows you to hook it to your backpack easily, grab and go.
You also want to pick up a few rolls of tracing paper. This is just an inexpensive translucent paper we use to lay over an existing drawing and iterate and refine our designs. You'll use a lot of this in architecture school. I like the 12”x50yd format in white by Bienfang.
presentation + modeling
Manual drafting tools are relics of the past; we don’t use these in practice today as everything is drawn digitally. Your school will dictate the how much hand drafting you'll be doing. So, although I look at my old tools with some fondness, they're nothing that I've used in my 30 years of practice.
You will, however, need an architectural scale: an Imperial and a metric one (location dependent of course). Download the guide for my recommendations.
Physical model building is a part of many design professionals process and it will always have a place in mine. Check out the videos and posts linked below for more information on the model making tools I use in practice.


Digital Tools
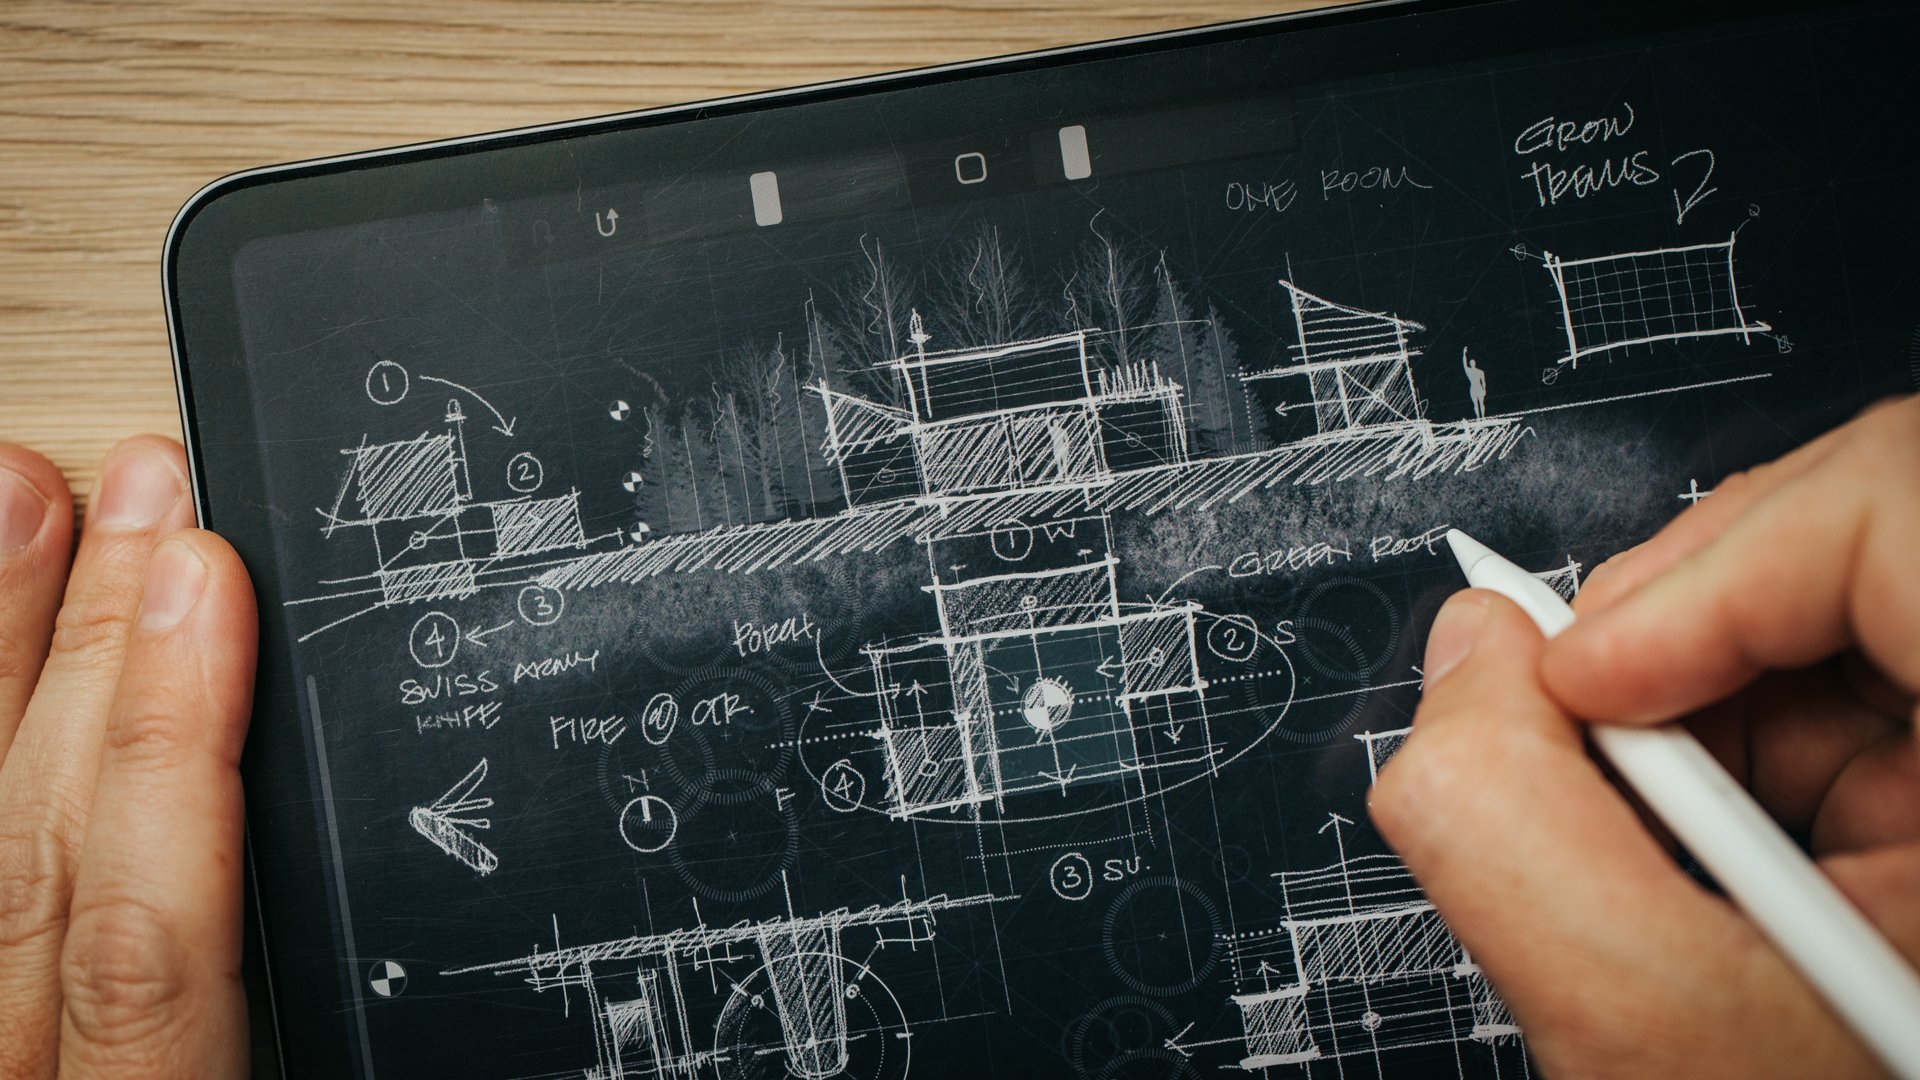
I use my iPad every single day. I use it to sketch in Procreate, for client presentations, for accessing drawings and specs on site visits. Learning to incorporate an iPad or a tablet into your workflow is going to be a skill you'll need as you graduate into the profession.
It's not, however, a replacement for a laptop. Because technology is always changing, check my laptop buying guide which I regularly update. Every school is going to have different requirements and they’re informed by the level of task you require (drafting is very different to real-time rendering). It's probably not going to be Mac-based, even though that’s what I use as a sole practitioner. Most of the software that we use as architects run on a PC. Be sure to check with your school.

Links to all the suggested tools, tech and accessories are included in the FREE resource download. Click the button below to download it.