I’ve been in my studio workspace for about four years now and as my needs have changed it was time to adapt the studio to meet new demands. As a destination separate from my home, yet still nearby, the separation has worked out well but hiring an intern for the summer meant I needed a dedicated workstation. And, I knew that the storage situation needed improvement. To make room, I started by decluttering and removing all the non-essentials I had gathered over the years. From there I sketched out a quick plan to rethink the organization and layout. The video shows the refresh from start to finish, more details below.
See the original studio tour video here.
New Workstation
The studio workspace was designed to adapt to a variety of functions. When I first moved in, it doubled as a music practice + performance space in the off-hours for our two boys and their friends. This practice space took up a full third of the floor area and was the most obvious place to locate the new workstation. With the instruments relocated to the main house, it was time to place the new furniture.
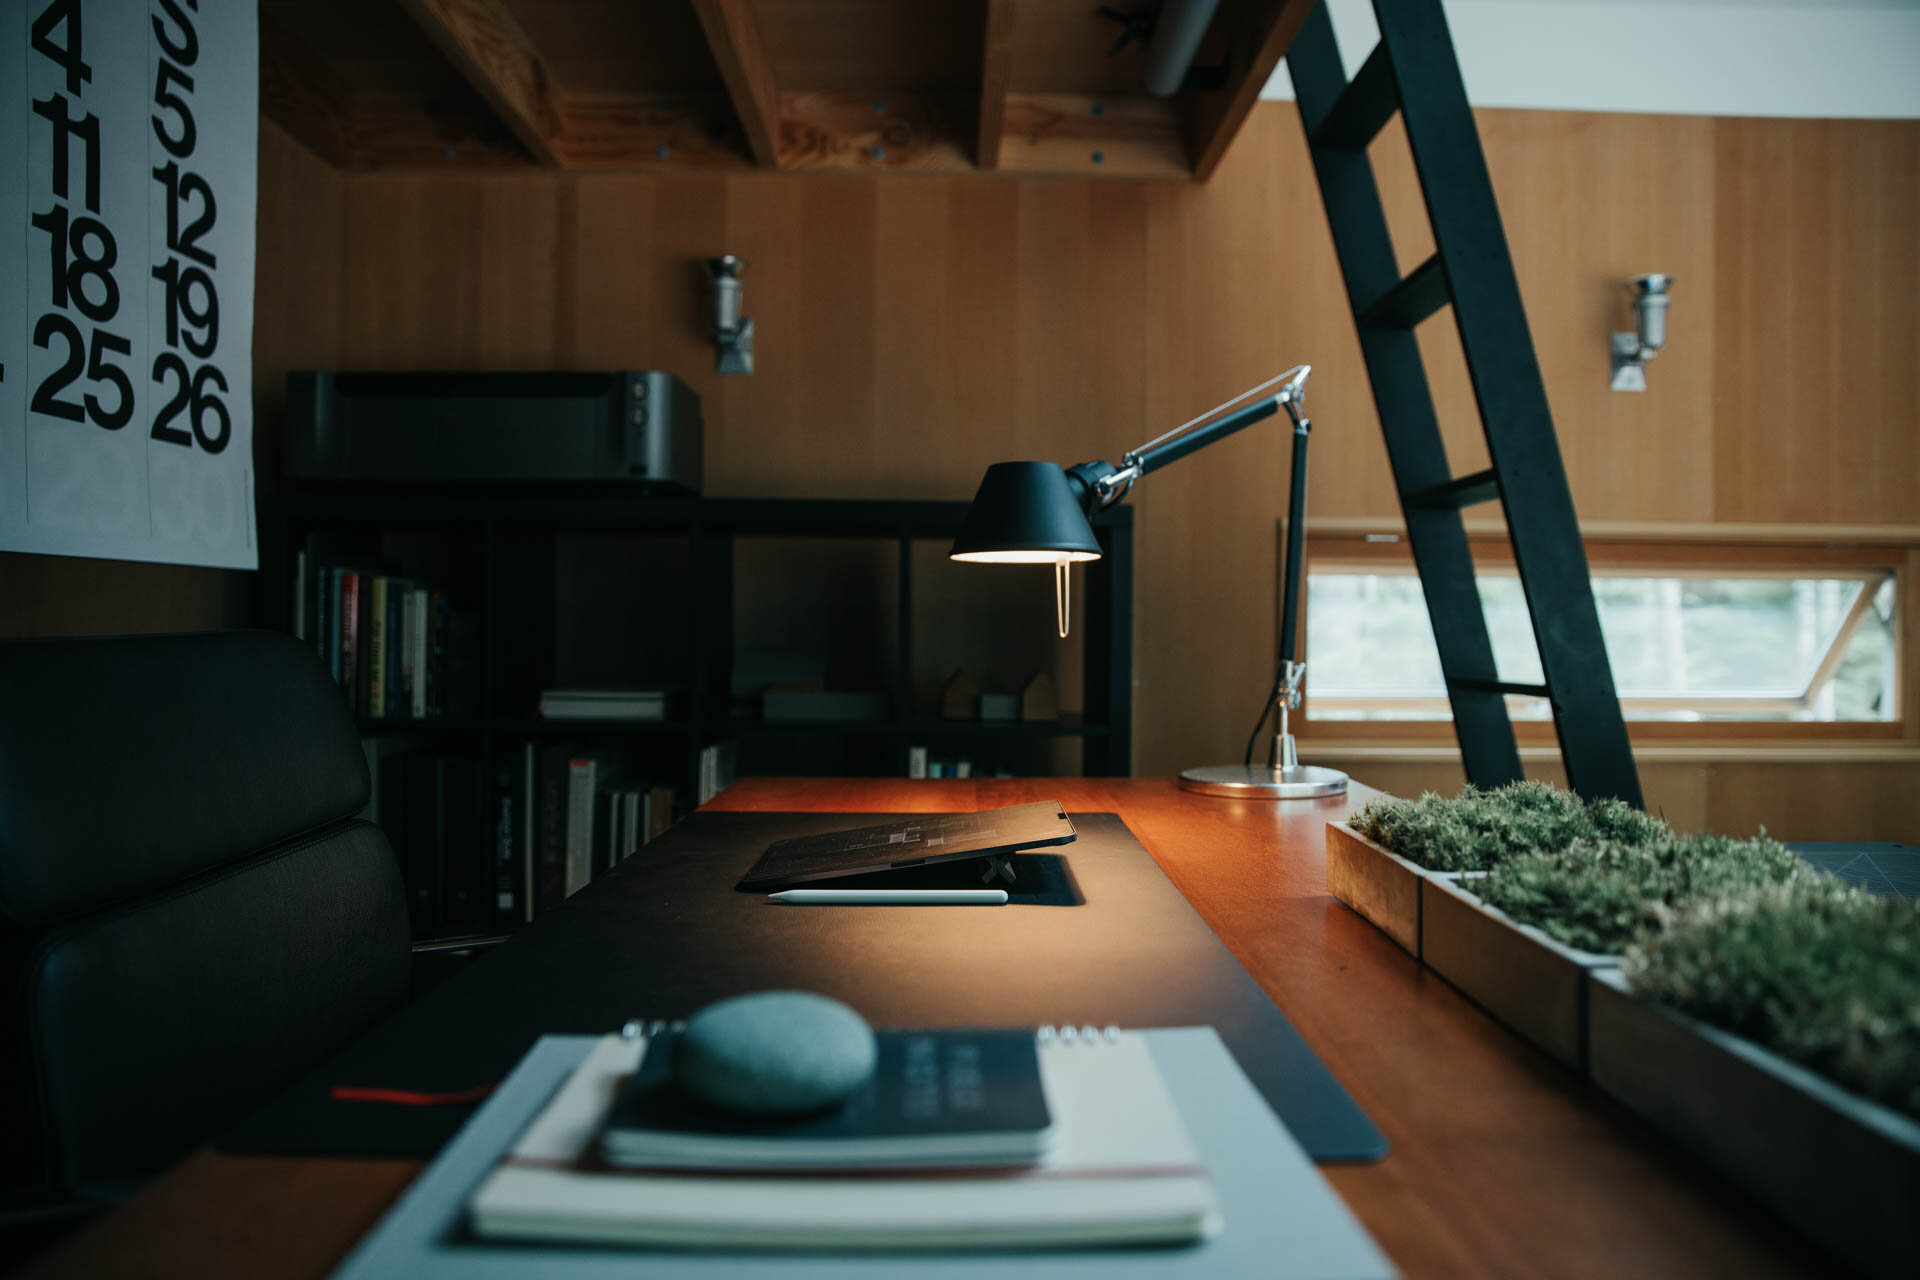
For the work surface, I chose a sit-stand desk with a massive, solid wood top and a flexible solution for a space used by multiple people. At 60” wide by 30” deep there’s plenty of room to accommodate everyone’s needs. The black hardware and natural wood top tie in with the other details in the studio. In a small space like this it helps to maintain a limited color palette so everything plays well together, here we’re using natural wood tones, browns, blacks and grays.
For seating I picked up two of the Soho drafting chairs by Laura Davidson. With heavy-duty cast aluminum bases, plush seats, tilting backs and removable arms these were a solid upgrade from my old creaking drafting chair. I swapped out the casters for roller blade style wheels for a quieter ride on the concrete floor.
New workstation (desk by Ergonofis)
On the Desk
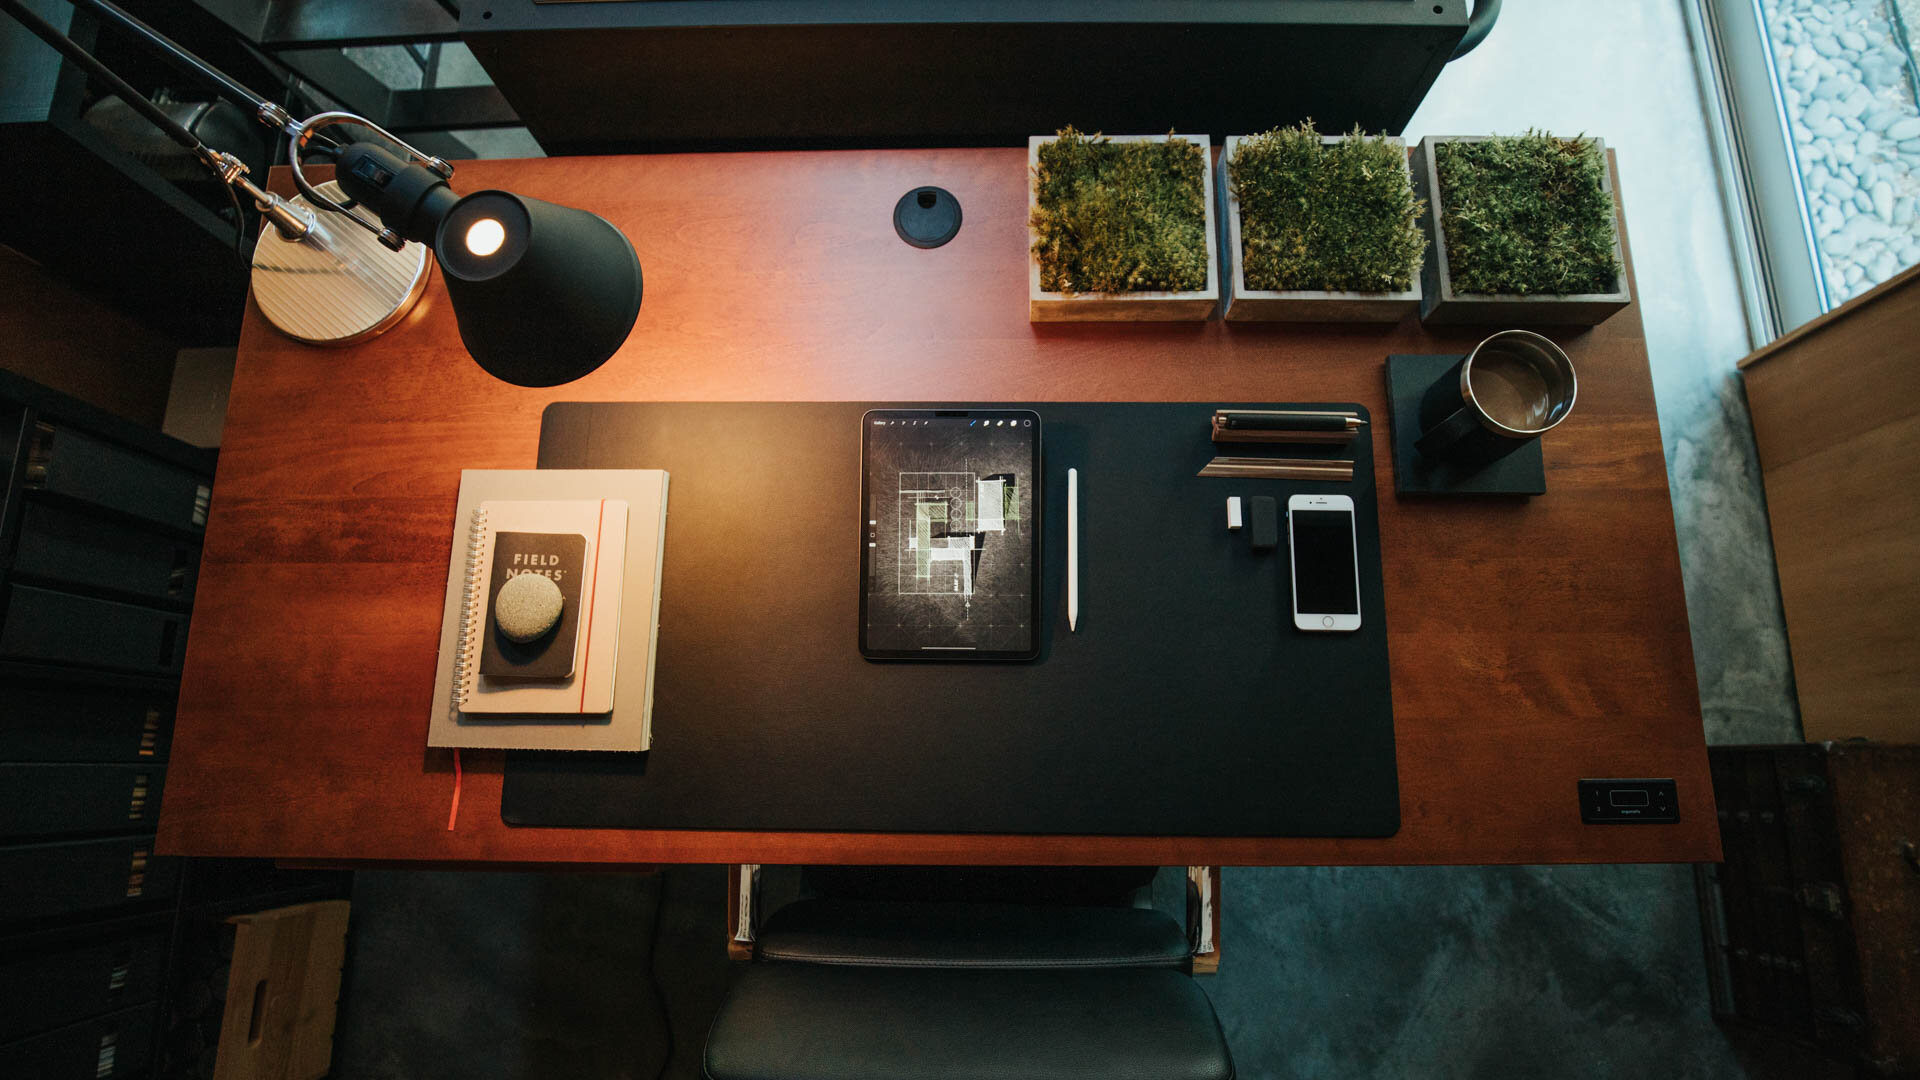
I removed all the knick-knacks, trays, external drives, and unnecessary clutter from my desktop and consolidated my small essentials (scissors, pens, pencils,) into a simple steel cylinder divided into four quadrants. To ground everything I purchased a large linoleum desk pad and swapped out the standard white apple keyboard and magic mouse for the space gray versions. I blacked out the front and base of my 27” iMac with a skin to complement the other black accessories. The coaster is a repurposed piece of black slate and I added a wireless charging pad by Anker.
Beneath the desk I mounted a black aluminum tray to hold my 8tb Lacie hard drive which stores all my digital files. I tidied up all the cables using split sleeve covers and used small black adhesive hooks throughout the space to keep my cables ordered and out-of-sight. I relocated the bluetooth soundbar that sat on the front of my desk to atop the shelving unit to my right to keep it out of view.
For task lighting, I picked up two of Artemide's Tolomeo mini desk lamps in black, I've always liked their timeless modern look and fitted them with 25W incandescent bulbs (much nicer light to sketch by than LED). Having stripped down my desk to the bare essentials, it was time for the rest of the studio to follow suit.
Walls + Backdrops
Because the north desk area often serves as a backdrop for filming I wanted a something different and darker there. One of the problems with the Douglas fir interior is that it's not a neutral tone, so it affects the ambient, reflected light in the space, which for filming isn’t ideal. Rather than painting the natural wood plywood on the north wall I chose to skin it with MDF and chalkboard paint. I mounted them on concealed Z-clips so I can easily remove them if I want to in the future.
On the MDF I installed two metal ledges from CB2 adding 8' of horizontal display space without taking up any floor area. I'm using them to display material palettes, books I'm reading and various found objects. Concealed along the front of the ledge are two play lights from Philips controlled via the Hue bridge system and their mobile app they serve as practical lighting in the background and can be changed to any color I choose.
Storage
When I built the studio, I didn't have the budget for built-in storage but if you want a minimalist, organized and clutter-free space, storage is essential. I've added two IKEA Kallax shelving units beneath the west windows. The upper cubes I'm using to store objects and as reserve capacity for books. The lower cubes I've fitted with Bladdra felt boxes - also from IKEA - to hold irregular objects and things I don't want out in view and collecting dust.
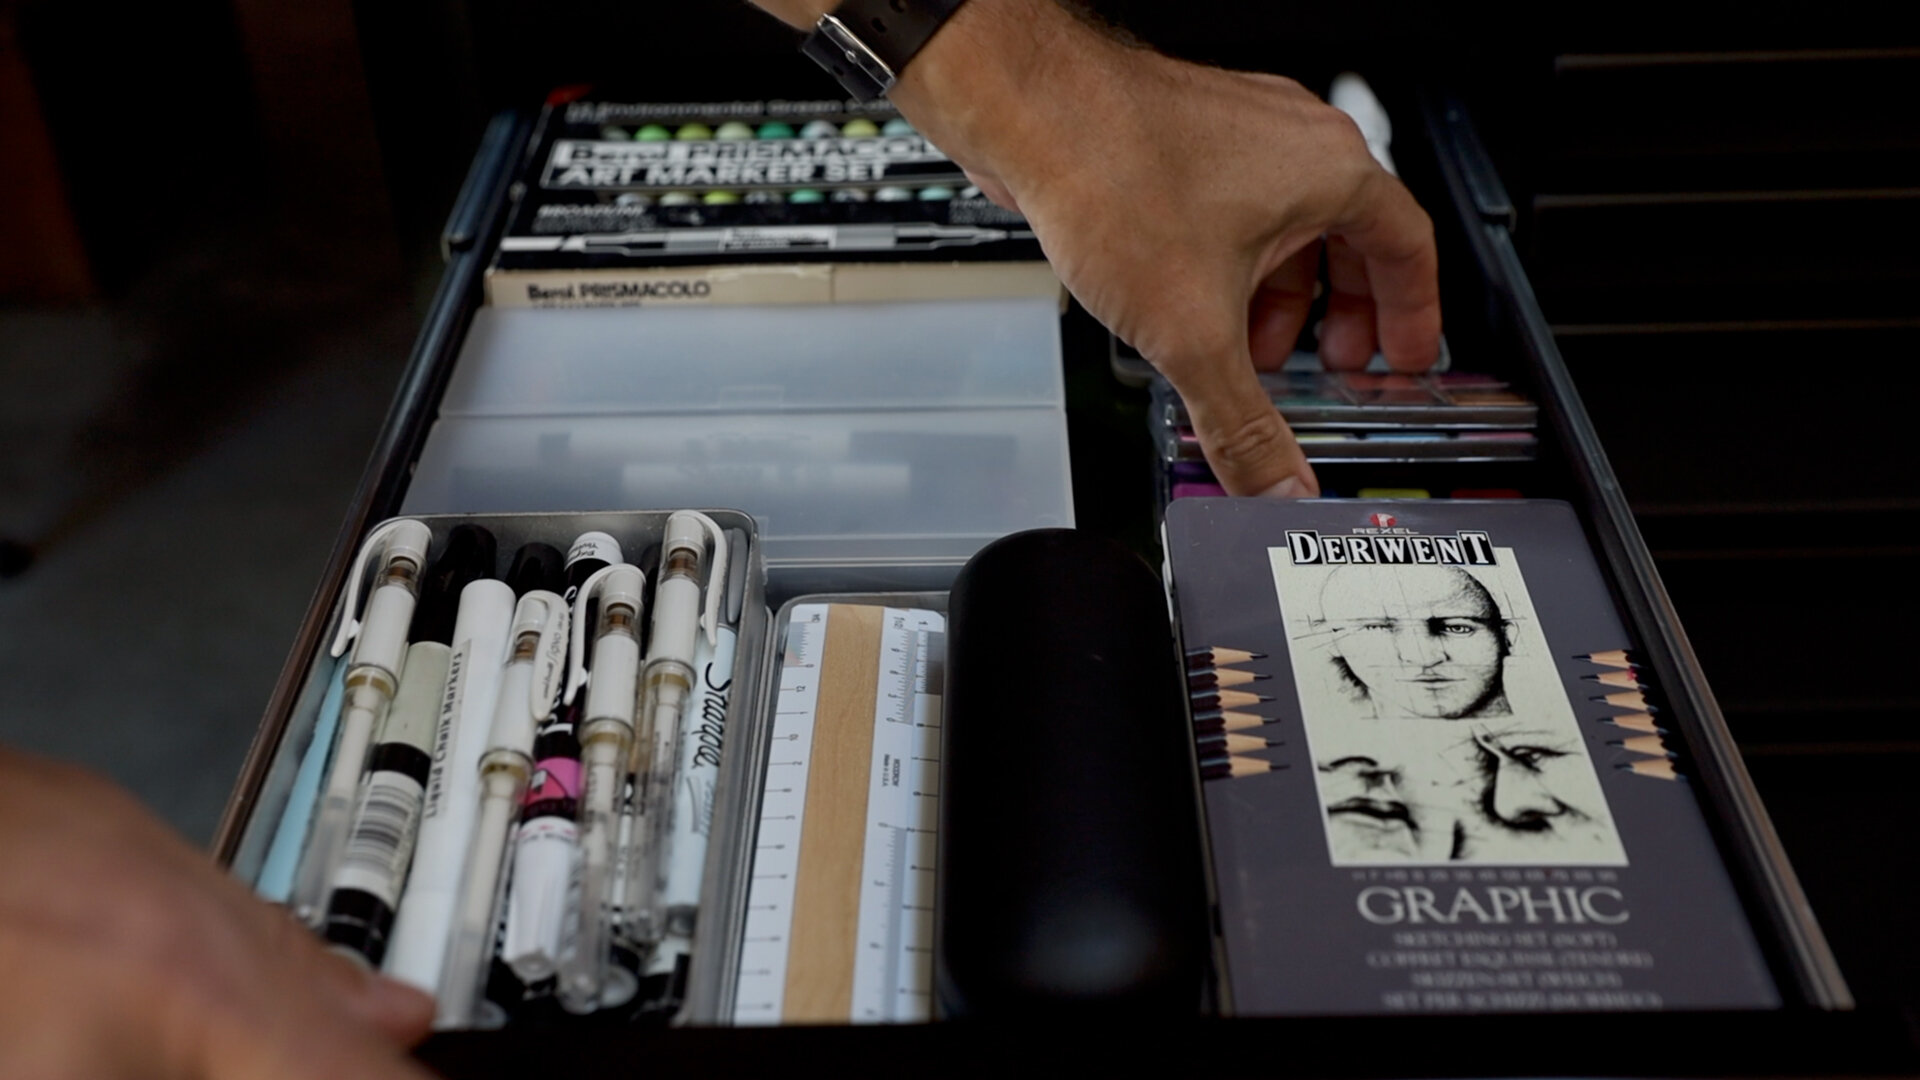
The rolling tool chest is by Husky, I'm using only the lower portion of the unit in the studio (the upper half holds tools in the basement) to organize all of my studio essentials, kiXstand samples, and camera equipment which still leaves plenty of space for new tools. With eleven drawers of varying sizes and depths it can hold a lot. The shallow drawers are easy to keep organized in a single layer. For the deeper drawers I picked up a few pouches and organizers to keep cables and smaller items grouped together.
The height of the base unit is perfect for making models and for filming or photography projects. My two large Alvin cutting mats live on top and off to the side is a rare earth magnet to hold my rulers and utility knife. When the standing desk is raised, the tool chest can easily meet its surface to give me an even larger surface to work on if needed. And if I find myself wanting additional walking space in the studio, The desk can be raised a little more and the toolbox can roll comfortably beneath it.
Styling
To pull it all together I added a few styling upgrades. I added three new prints adjacent to the new standing desk which cleverly conceal the old guitar mounts and these are matted in ice-white with black aluminum frames. These were printed in-house using Canon's Pixma Pro 100 on low lustre paper an incredible printer for less than $300. (For printing drawing sets, I use the HP T210).
To hide the (off-center!) mini-split heating unit, I picked up the Stendig wall calendar by Massimo Vignelli, which I slipped into a concealed poster sleeve and mounted to the loft floor joists above.
To bring a little of the natural landscape inside, I repurposed four concrete napkin holders by Port Living Company to plant moss in and I picked up a tiny Chinese elm bonsai to live on the corner of my desk. By adding these minor accent pieces, you can bring a certain life and personality to your workspace that can simultaneously make your office feel much more inviting. To this I’ve added a few additional inspirational objects and I finally feel like it’s a cohesive workspace with room to spare.
It's a series of progressive upgrades, an evolved, tidier version of what I started with. Our workspaces are guaranteed to change over time along with our priorities and needs and I love that this is a space that can adapt and change with me.
Check out this and all of my curated kits on kit.co.
Considering a dedicated studio space?
Read more: Five signs it’s time to rent (or build) your own.
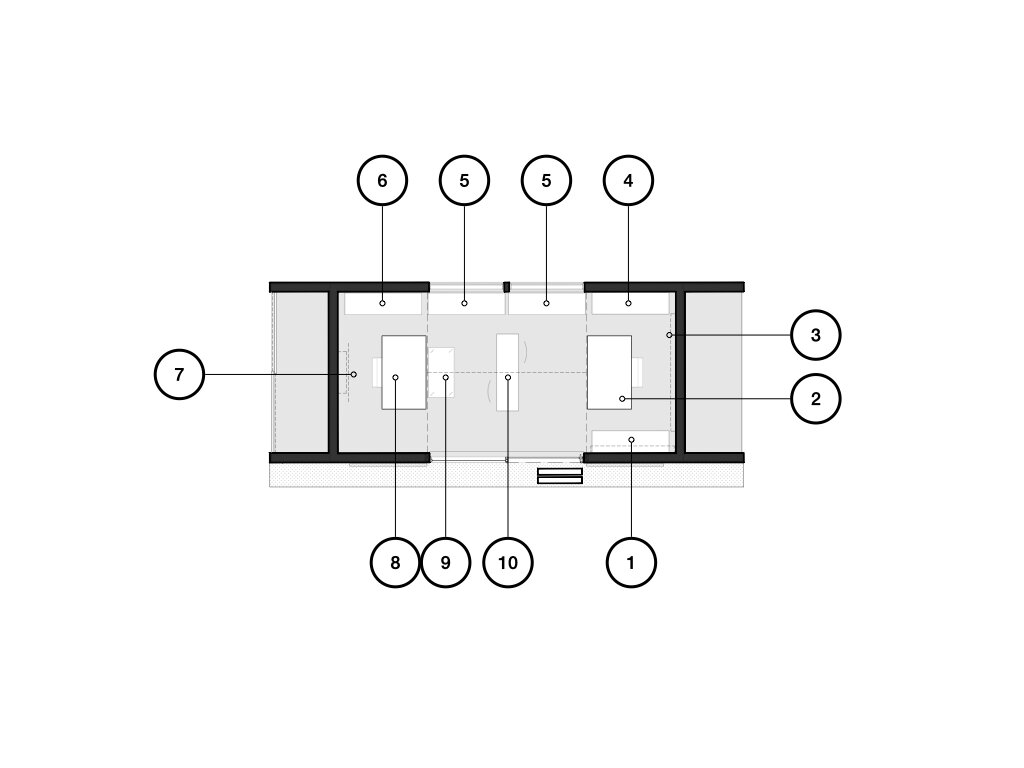
Studio Plan diagram
1. Photography/Printing Space: This is where I keep most of my essential photography equipment, from lenses to batteries. In addition, because of it’s proximity to my desk, My printing tools, including the large format printer also live here for easy accessibility.
Above this are two wall mounted cabinets with flip-down tops which hold stationery, pens and my drone (closest to the main door).
2. Main Workspace: Where I spend the most time in the studio. My iMac, Laura Davidson chair, sketching implements and computer accessories all find their place on my vintage drafting table to create a focused and productive work environment.
3. Display Shelves: A pair of metal ledges run behind my desk and are (currently) being used for display. They also hold my play lights by Philips that provide ambient lighting in the morning + evening, and, practical lighting for filming.
4. Book Storage: This shelf contains references, inspirations, information, entertainment, a few personal accolades. The books I keep here are amongst my most-prized possessions as an architect. On top I have a sound bar which streams music.
5. Storage Units: One of the most impactful upgrades in the refresh, these shelves house concealed items on the lower tier and provide buffer space for an ever-growing library above.
6. Shelving Unit: Unlike the unit of matching design on the other side of the studio, this shelf holds a variety of resources: material sample binders, floor samples, magazines, modeling supplies and paint and a few architectural models. For now, the Canon printer also lives atop this unit. It’s a solid choice to produce colorful, frame-worthy prints, but needs a more accessible permanent home.
7. Minimalist Calendar: Although it’s purpose is to cover the - distractingly off-center - mini-split heating head, this calendar by Massimo Vignelli is a minimalist graphic addition to the studio. Every other month inverses the white and black (see images above).
8. Secondary Workspace: The new workspace is anchored by a Standing Desk. It’s adjustable birch top allows me to be able to easily switch between standing or sitting work environments and accommodates a variety of uses. The Laura Davidson swivel chair is paired with the desk, a comfy upgrade at a fraction of the cost of the Eames Management chairs by Knoll.
9. Tool Chest: One of the largest new furniture pieces in the studio, the Husky rolling tool box houses everything from camera equipment to power tools. I’ve converted it’s available surface so that it when the new desk is brought level, it creates a massive, singular workspace. When the desk is raised higher, the chest can be easily moved under it to provide additional open space.
10. Meeting Table: As more new additions were made to the studio, I found that that the spaces for simply walking had become much too cramped. And given our current situation, in-person client meetings have become a rarity. So I removed one of the tables from the meeting space.
