The digital tools of architecture practice are always changing, but I think most architects will tell you that analog tools - sketching and model making - are an unchanged part of their design process. I find making things by hand - the craft of it - forces me to slow down, to think and to explore. It’s often a failed experiment that pushes the work in a new, unexpected direction.
The design process always begins with a sketch and the idea I’m exploring with this new project is how the home can amplify the specific conditions of the site, from the topography to the weather and the changing seasons. The sketch is purposefully open-ended and left open to multiple readings. It’s not a fully formed idea and so to further explore the concept I construct a study model. I use it to study the building forms and site relationships and it’s essentially a three-dimensional sketch.
In the video watch as I turn the conceptual sketch into a working study model which I'll then use as a presentation and design tool for an upcoming client meeting.
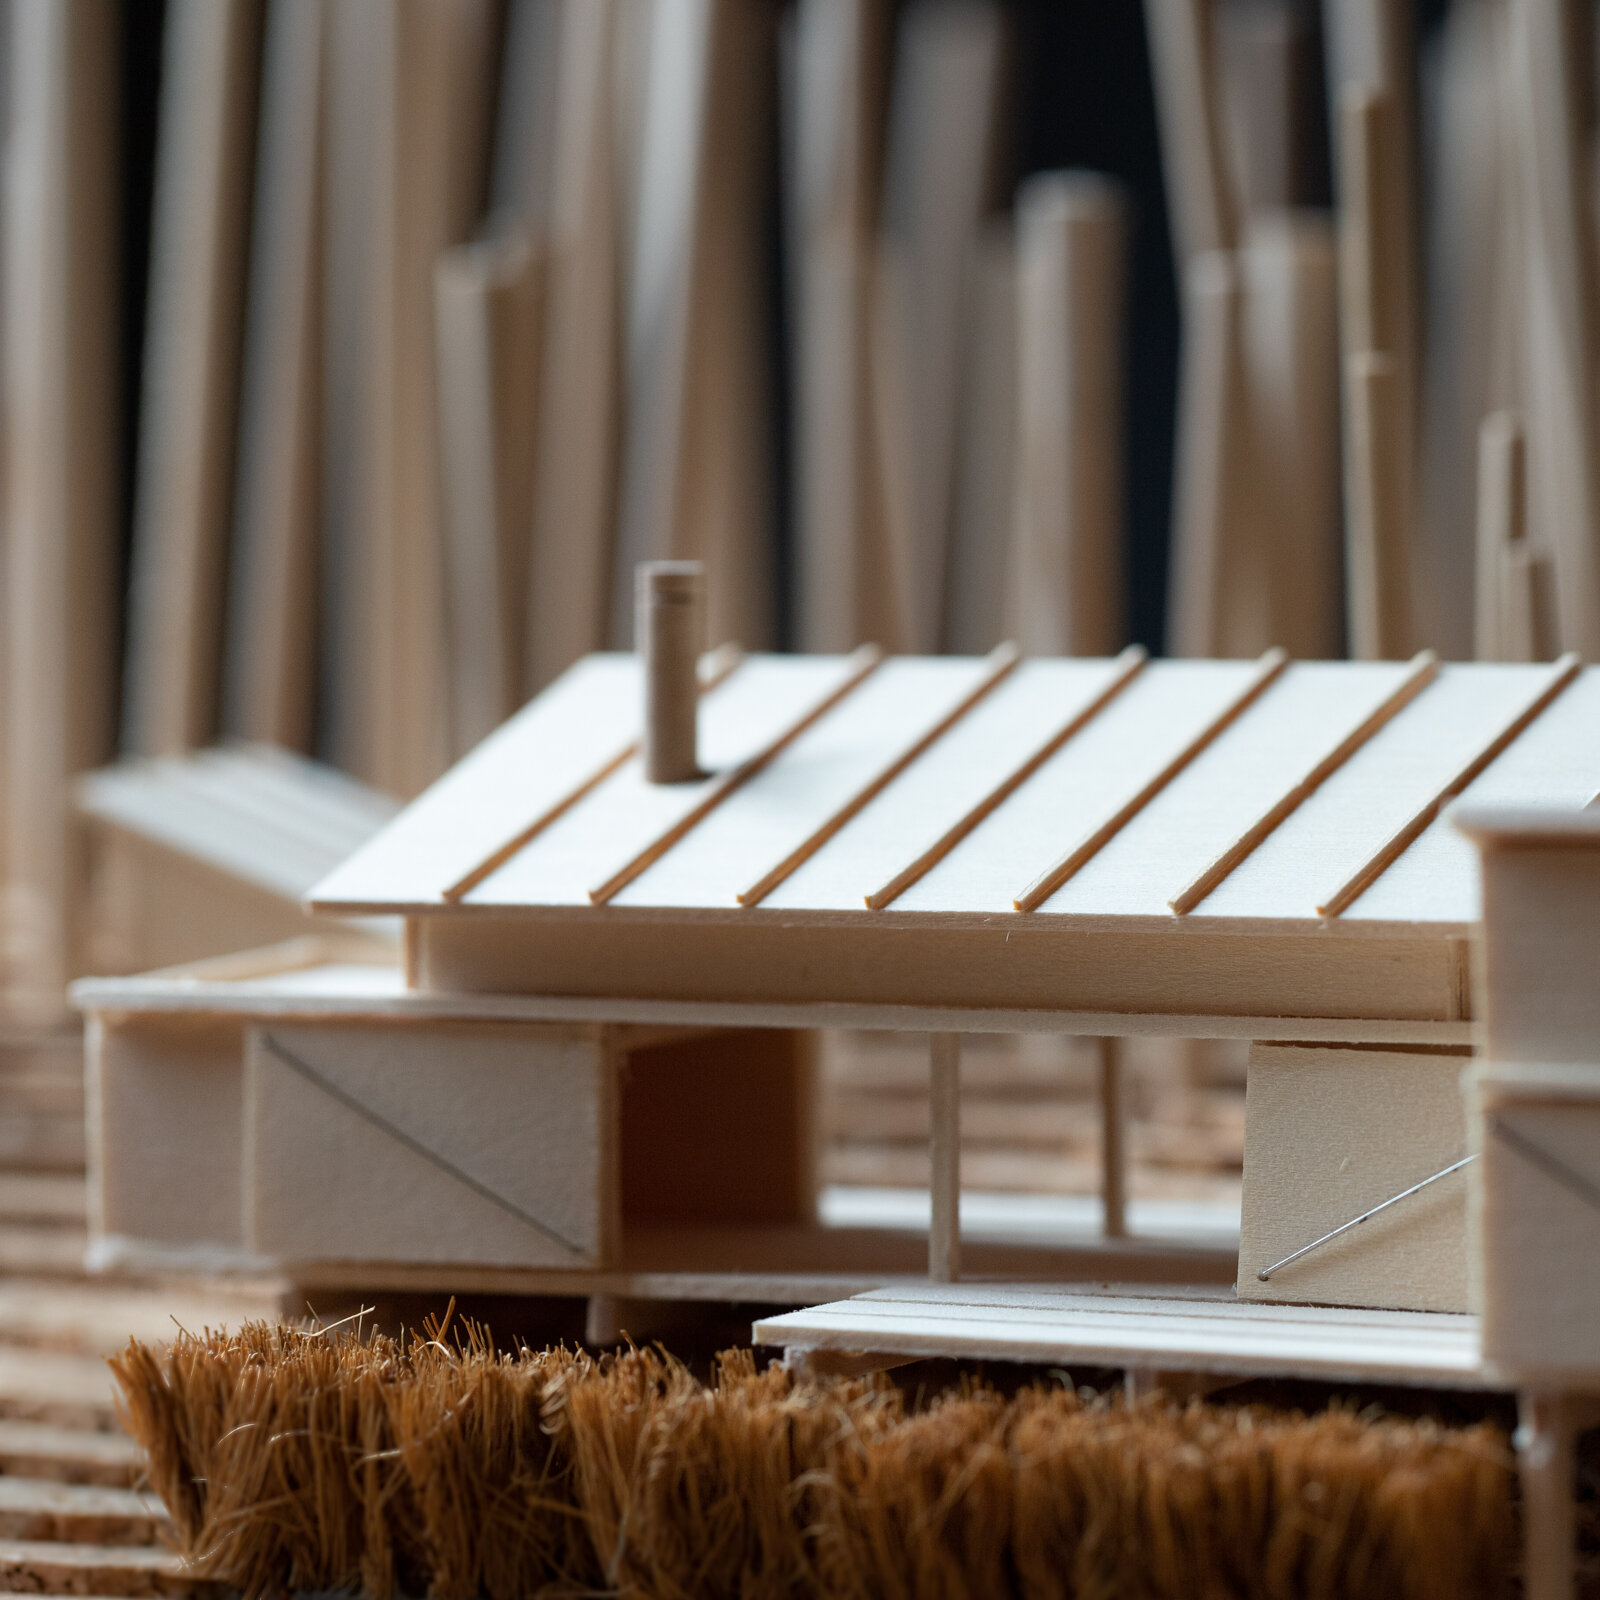
Finished Study Model
Material List:
Model base: 1/4” tempered hardboard (Masonite) on 1” thick corrugated cardboard
Building Volumes: 1/16” Basswood Sheets
Barn Doors: Basswood Profile Sheets + Guitar String Detail
Interior Massing Blocks: Jenga + Cast Acrylic Samples
Roof planes: ‘Quartz Zinc’ Sheet
Ground planes: ‘Anthra-Zinc’ Sheet (water), ‘Quartz Zinc’ Sheet (parking surface)
Decks: Skinny Sticks + Match Sticks
Trees: SuperTrees
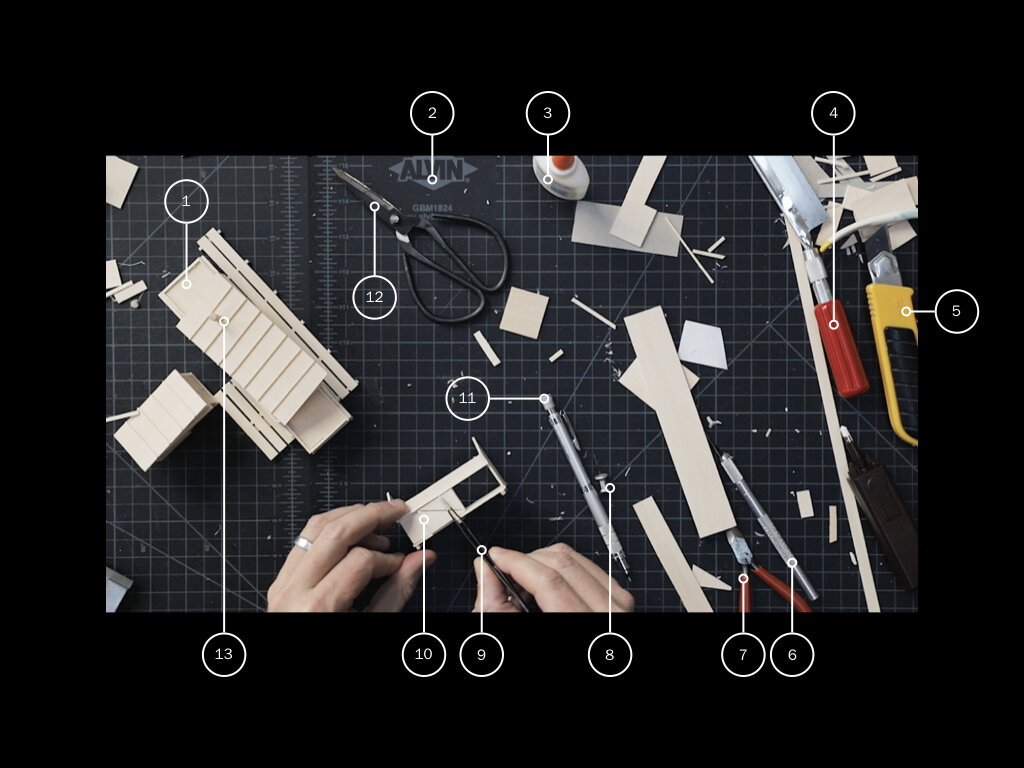
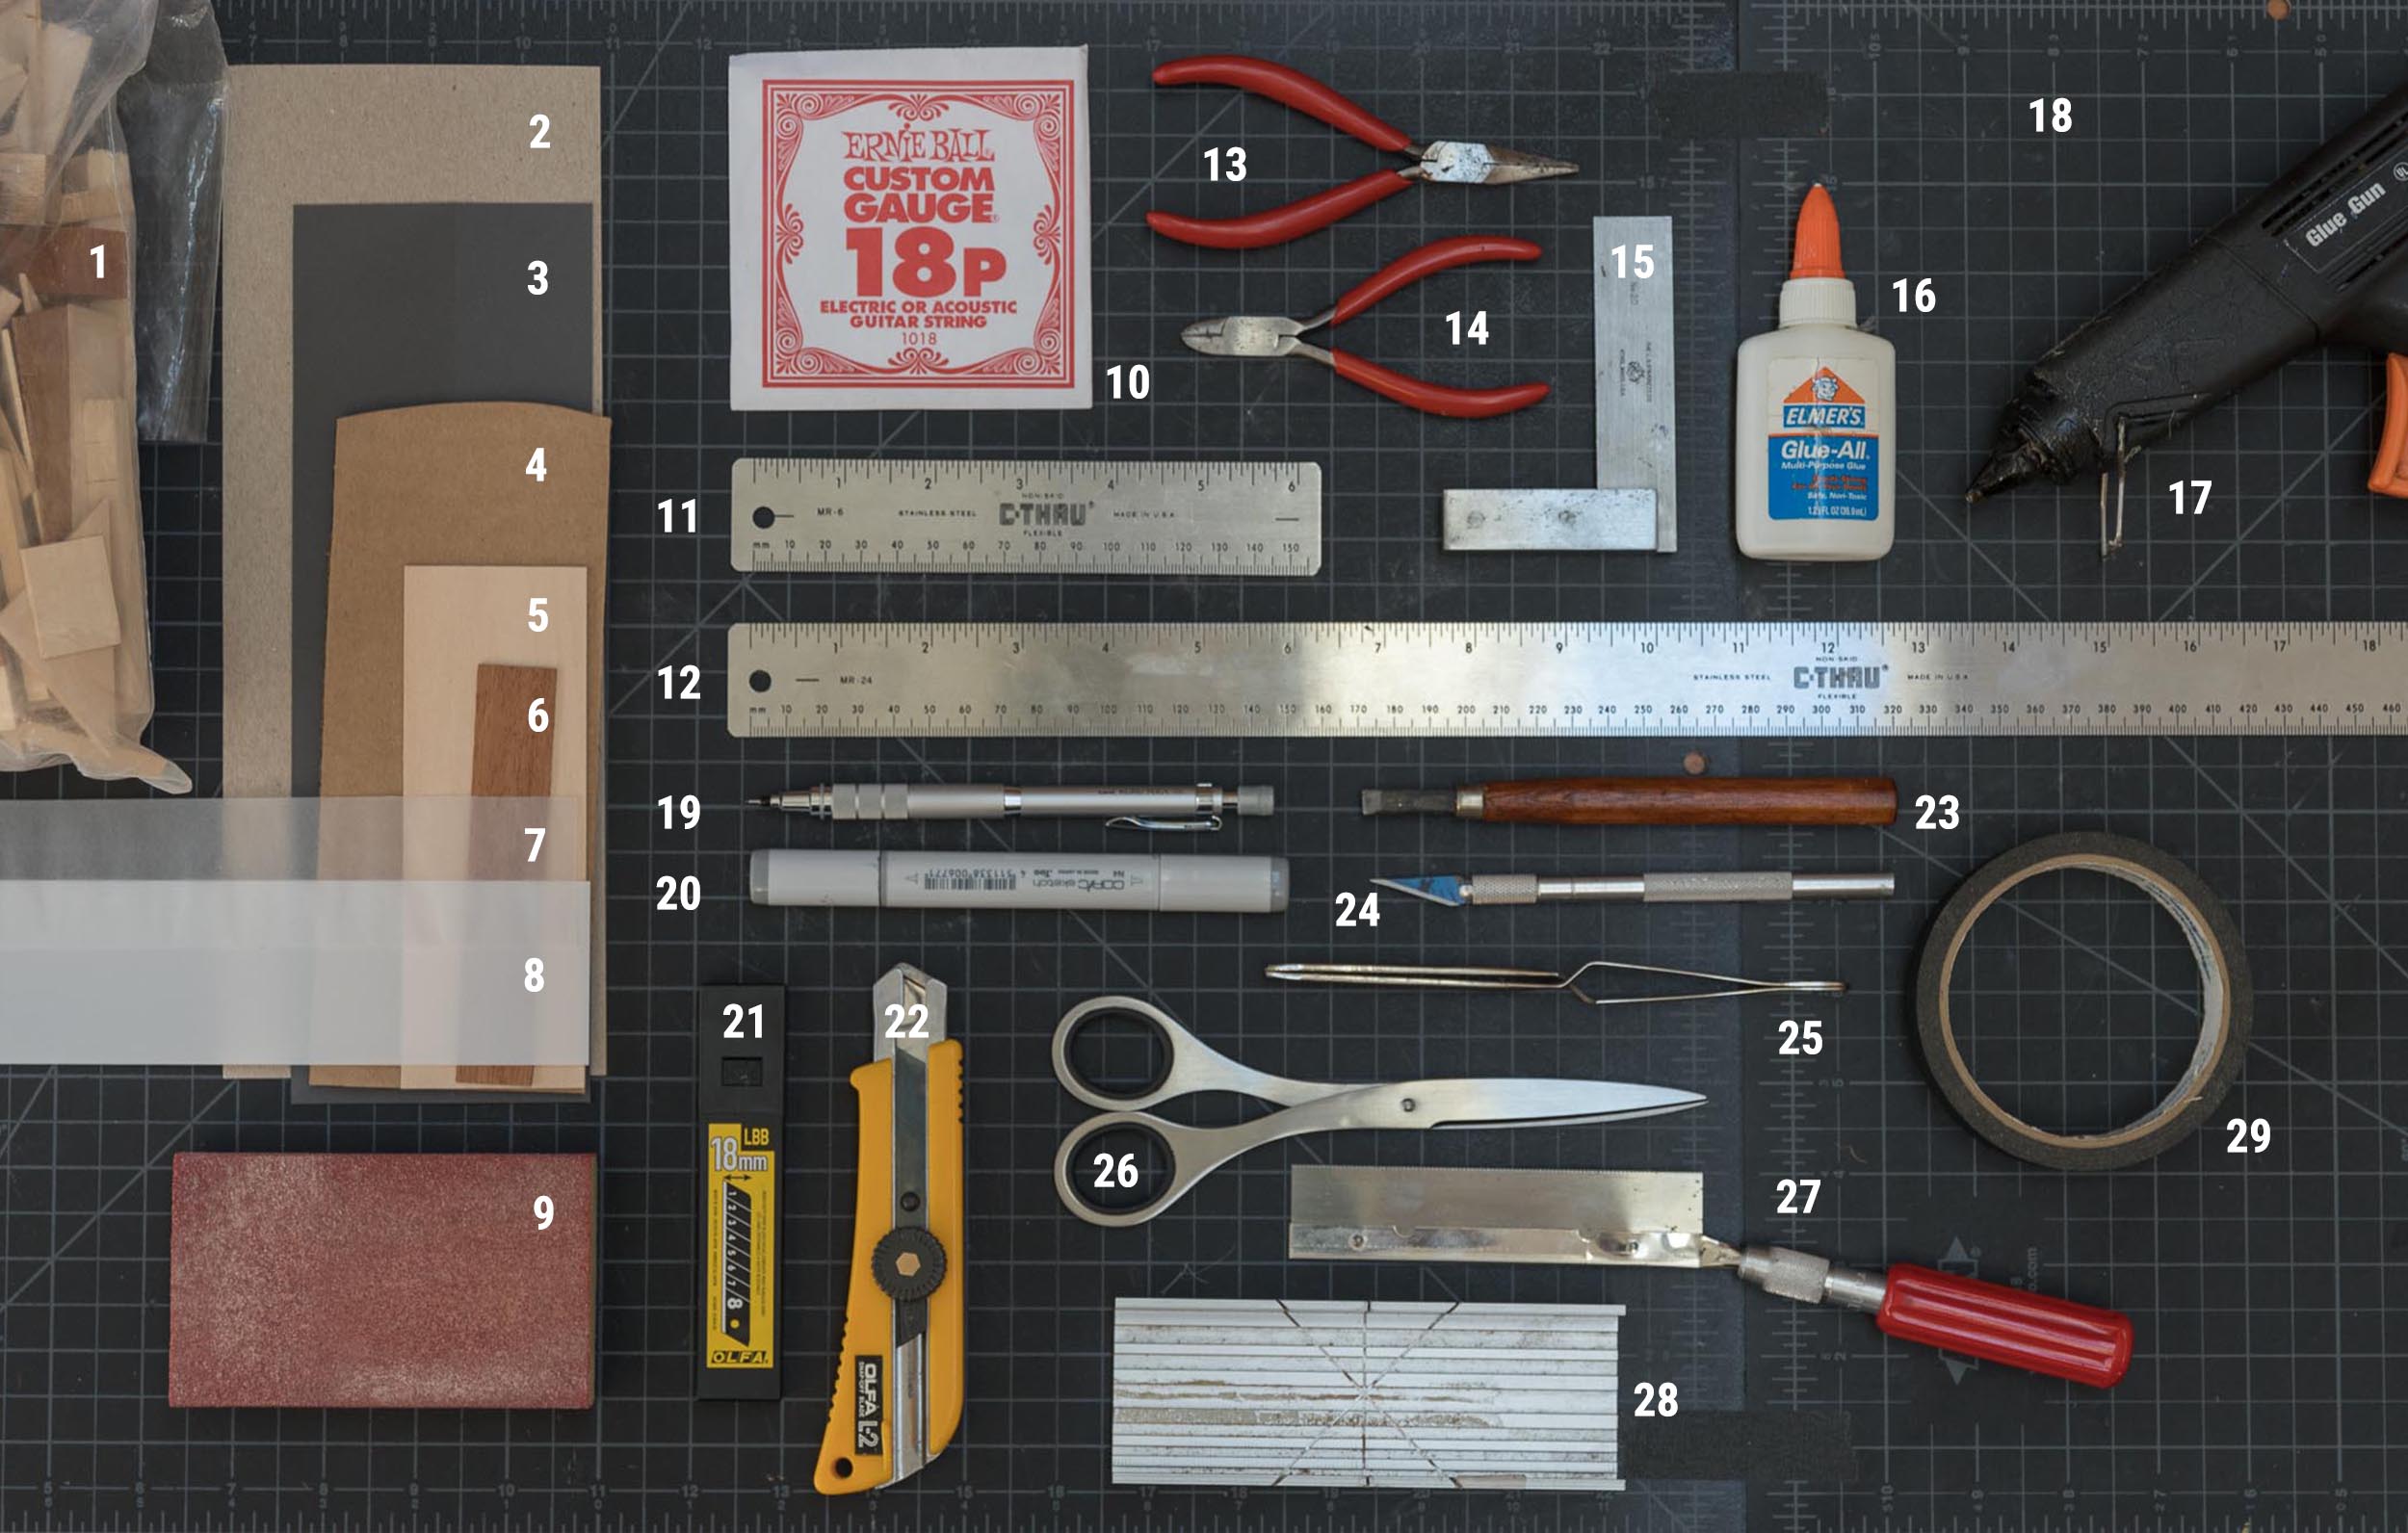
Tools Used:
Sketchbook: TRACE Sketchbook (for more on my sketching tools, see this page.)
Ruler: Alumicutter - proven to save fingers.
Utility knife: Olfa L2 + blades
Allex Stainless Steel Scissors - quick cuts on a variety of materials: paper, chipboard, wood
Modeling Tweezers - immensely helpful for all modeling tasks
Hot Glue Gun - for quick + dirty modeling tasks
Elmer’s Glue-All - purchase in bulk, rack over to a small bottle to save time while gluing.
X-Acto Plastic Clamps - an extra set of hands
Gorilla Tape - for mounting metal pieces (like the roof planes)
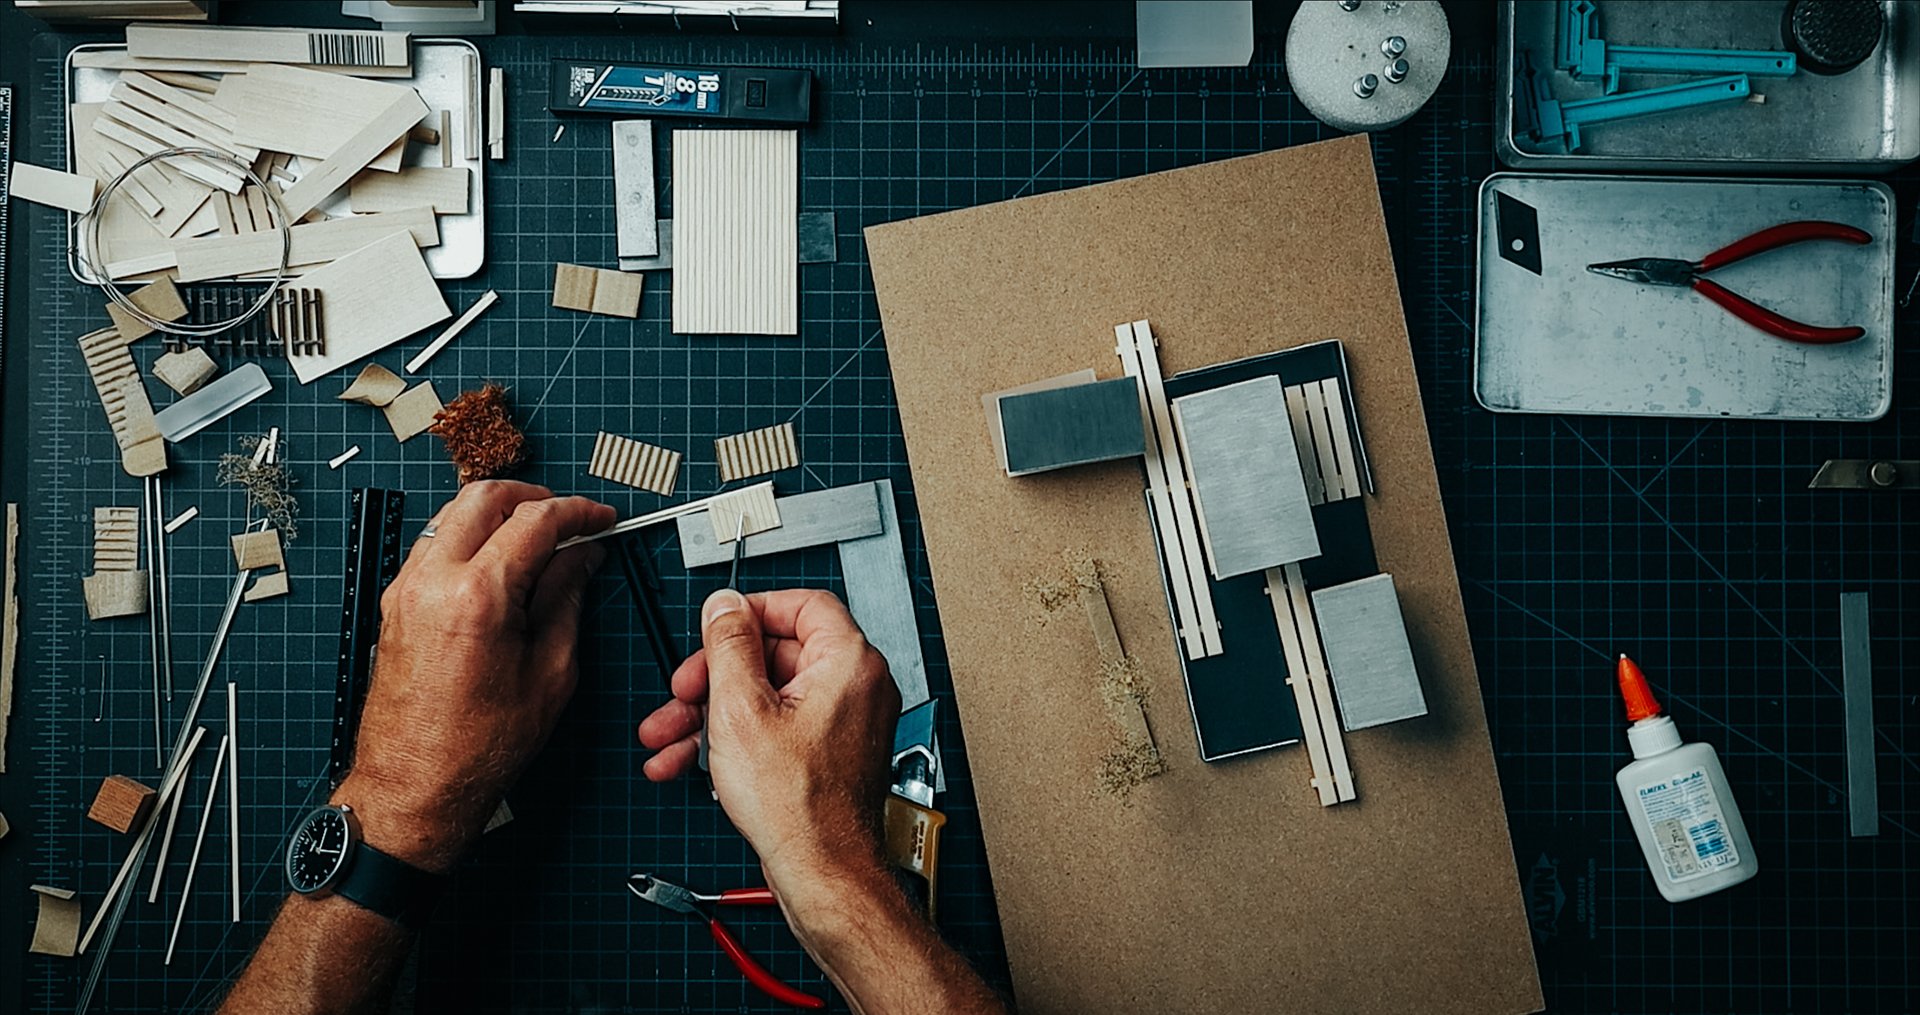
Model in Process