What's In My Bag - Architect Essentials

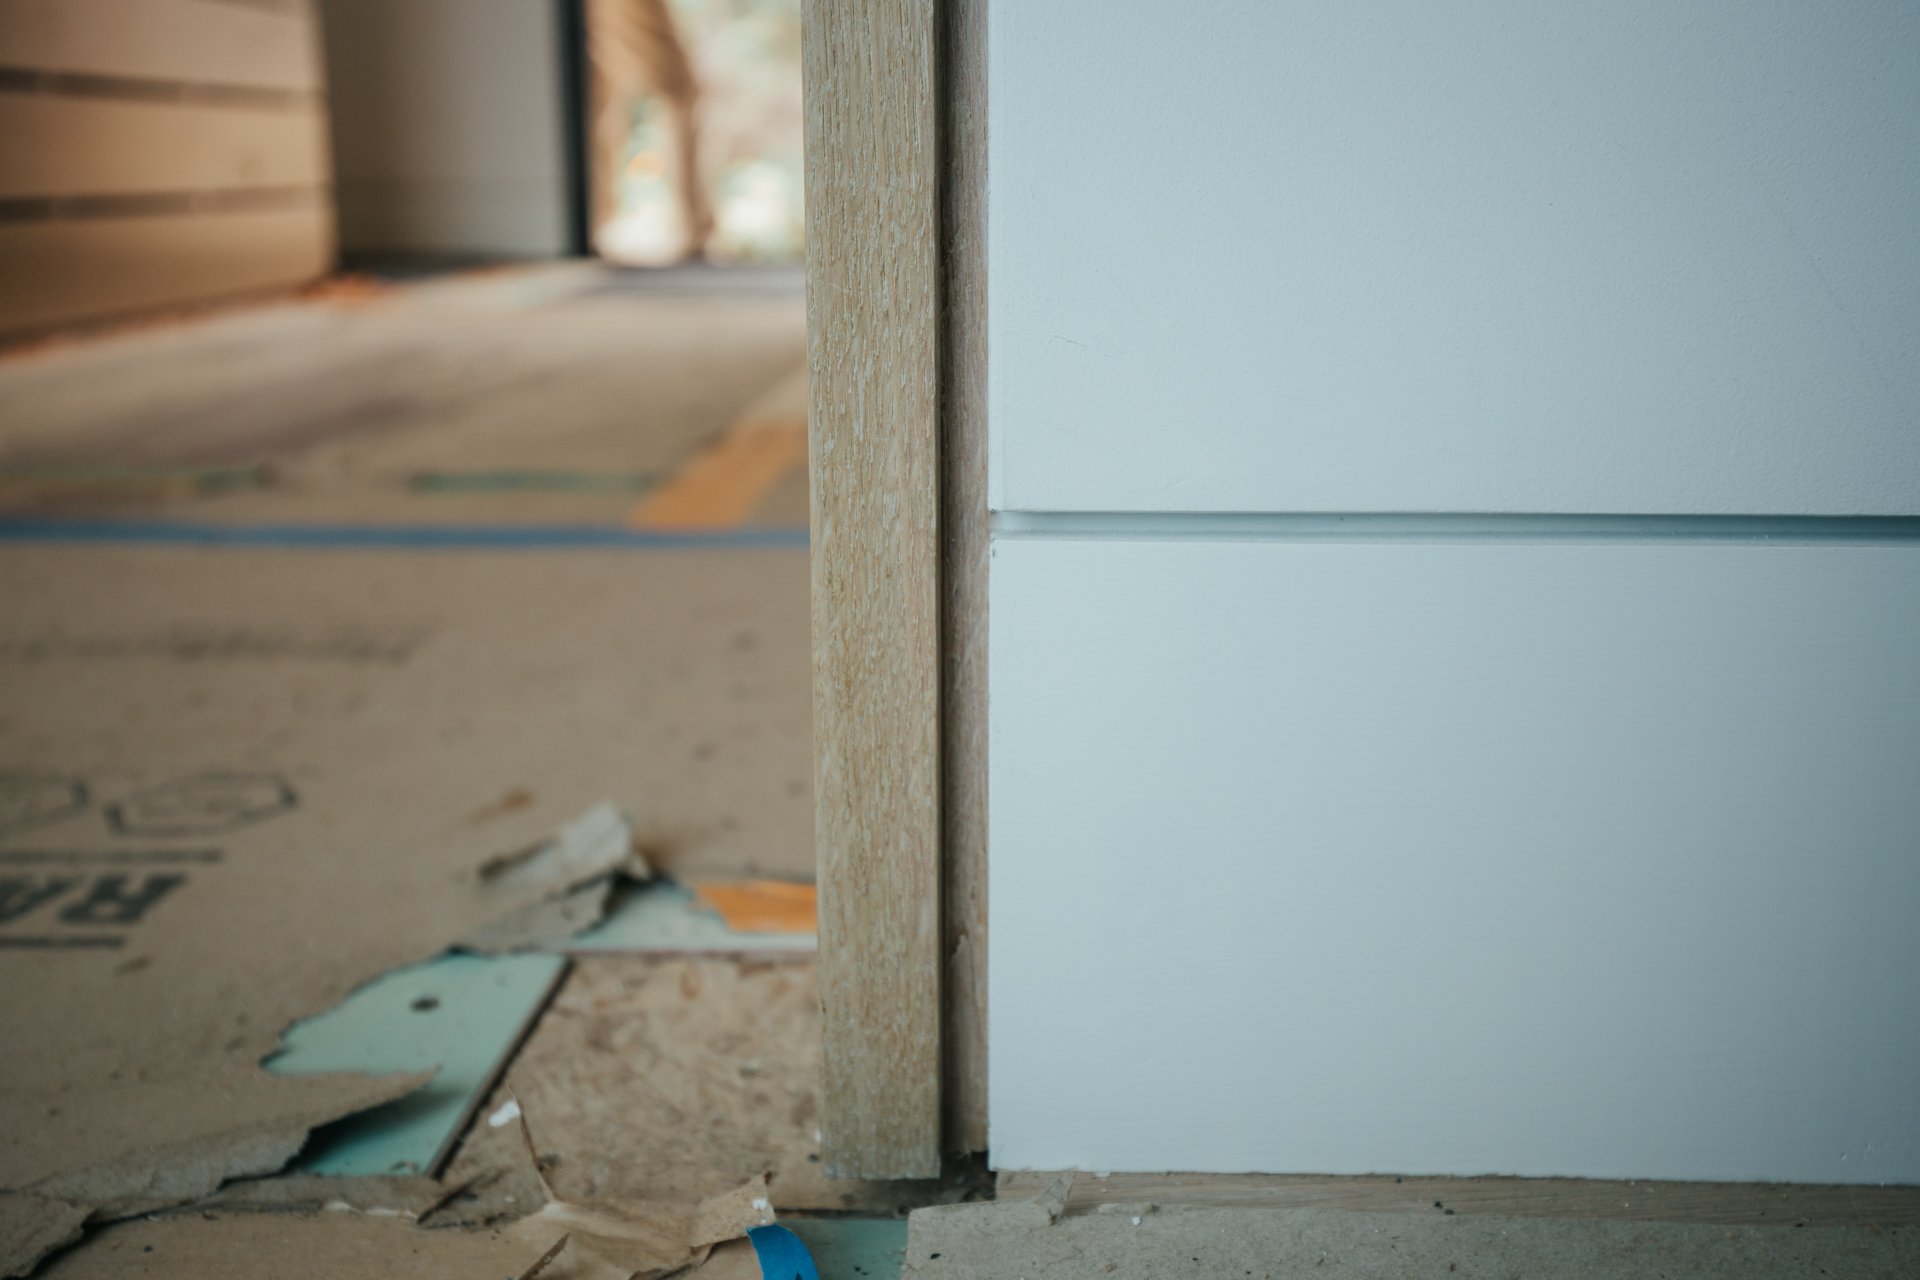
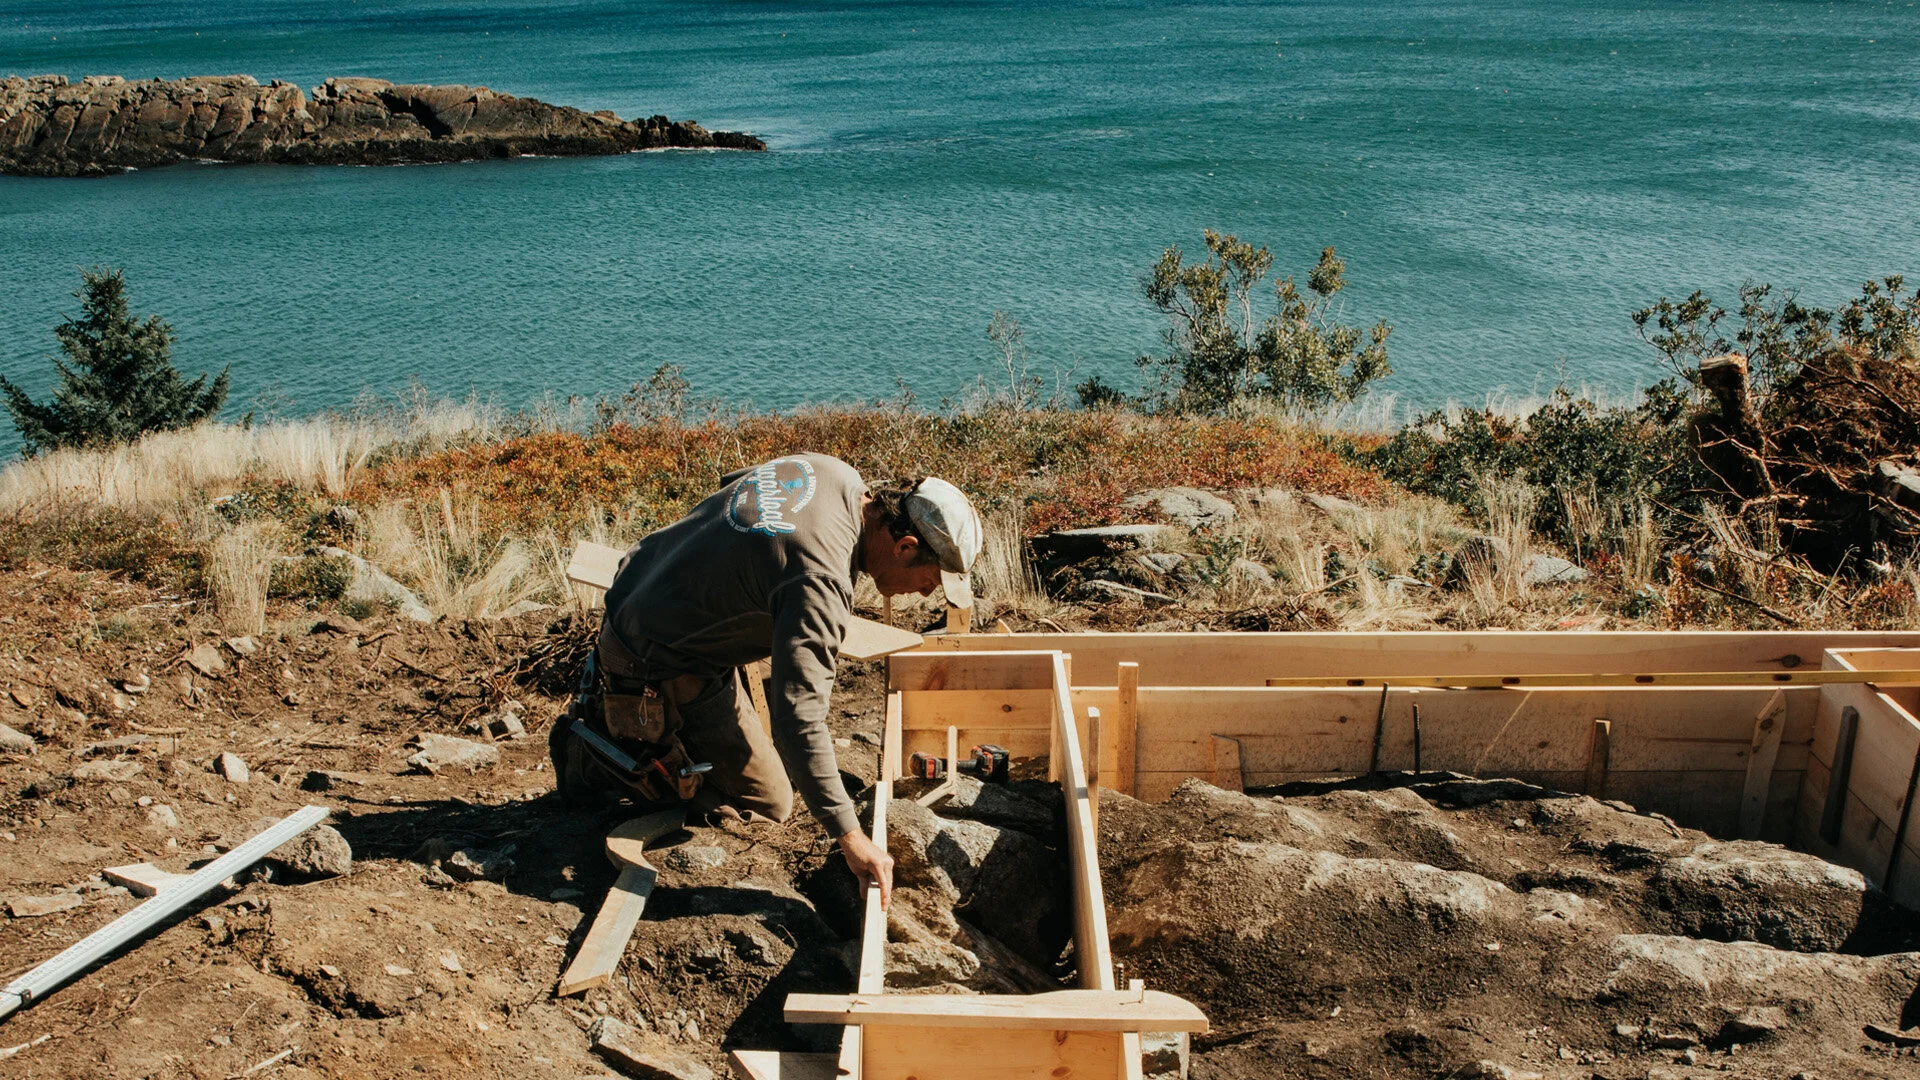
Time spent on construction sites has unquestionably made me a better architect and improved my design process. During construction, I visit the job site as often as I can, it’s the best way to avoid surprises and keep the lines of communication open with the construction team. In the video below you’ll see how I prepare and pack for these field visits and all the gear I bring with me.

Pre-Planning

Before I head out, I always have an organized plan for the visit because the job site can be a busy place and this ensures I don’t forget anything while I’m out there. I use Notion for this as it syncs with all my devices in real-time. I have checklist templates for each stage of design and construction. Each includes a list of everything I need to bring and remember to do while I’m there. My general rule is to build templates for every repeatable process in the business and Notion makes it easy to create SOPs (Standard Operating Procedures).

With my checklists and meeting agenda done, I check-in with the drawings and previous meeting notes to familiarize myself with the work I’ll be reviewing and I update my iPad with the current PDF version of the contract documents: the drawing set, schedules and specifications.

The type of visit and stage of the project determines whether I’ll bring one or two bags. The backpack will always travel with me, it has all the essentials and I’ll bring along the tote for bulky or difficult to pack items.

Let’s start with the backpack.

BaCKPACK

I like camera bags for site visits and leisure travel and LowePro make some of my favorites. This is the ProTactic 450AWII and at 45 liters it’s definitely not a small bag, but it hits that perfect sweet spot for me. It’s large enough to fit a few extras but not so large that I can bring all the gear I own. It forces me to make some strategic choices while packing.

It has a clean, low-profile, semi-rigid exterior shell covered in MOLLE webbing which gives it a tactical vibe and I picked up a bag of MOLLE clips to fasten things to it as-needed. It came with a padded hip belt which I removed, and a few accessories which I can velcro to the shell (a tripod foot cup, water bottle holder and a small bag) but I prefer the clean exterior especially when I have to slide it into an overhead airline bin.

Most of what I’m carrying with me isn’t camera gear, but the reason I like camera bags is because of the padded interior dividers that I can easily change to suit whatever it is that I’m carrying. For site visits I like having separate compartments to keep things organized and protected and for travel I can set it up to carry my camera gear, a few tech pouches and some personal items, it makes a great day pack.

Cameras**

I have three cameras that travel with me, the best quality images and video come from my mirrorless DSLR, the Canon EOS R has been my go-to camera for a few years now. For lenses, if I have to choose just two for my site visit kit, I’d choose the Canon EF 16-35mm f4L IS for it’s wide field of view. And, for details I’d opt for the Canon EF 100mm f2.8L IS Macro. These allow me to capture most spaces I encounter on a typical job site - from very tight interiors and broad exterior facades to intricate details.

I also bring along a Pelican SD Card Case and a few extra batteries.

**(More on my camera gear here)

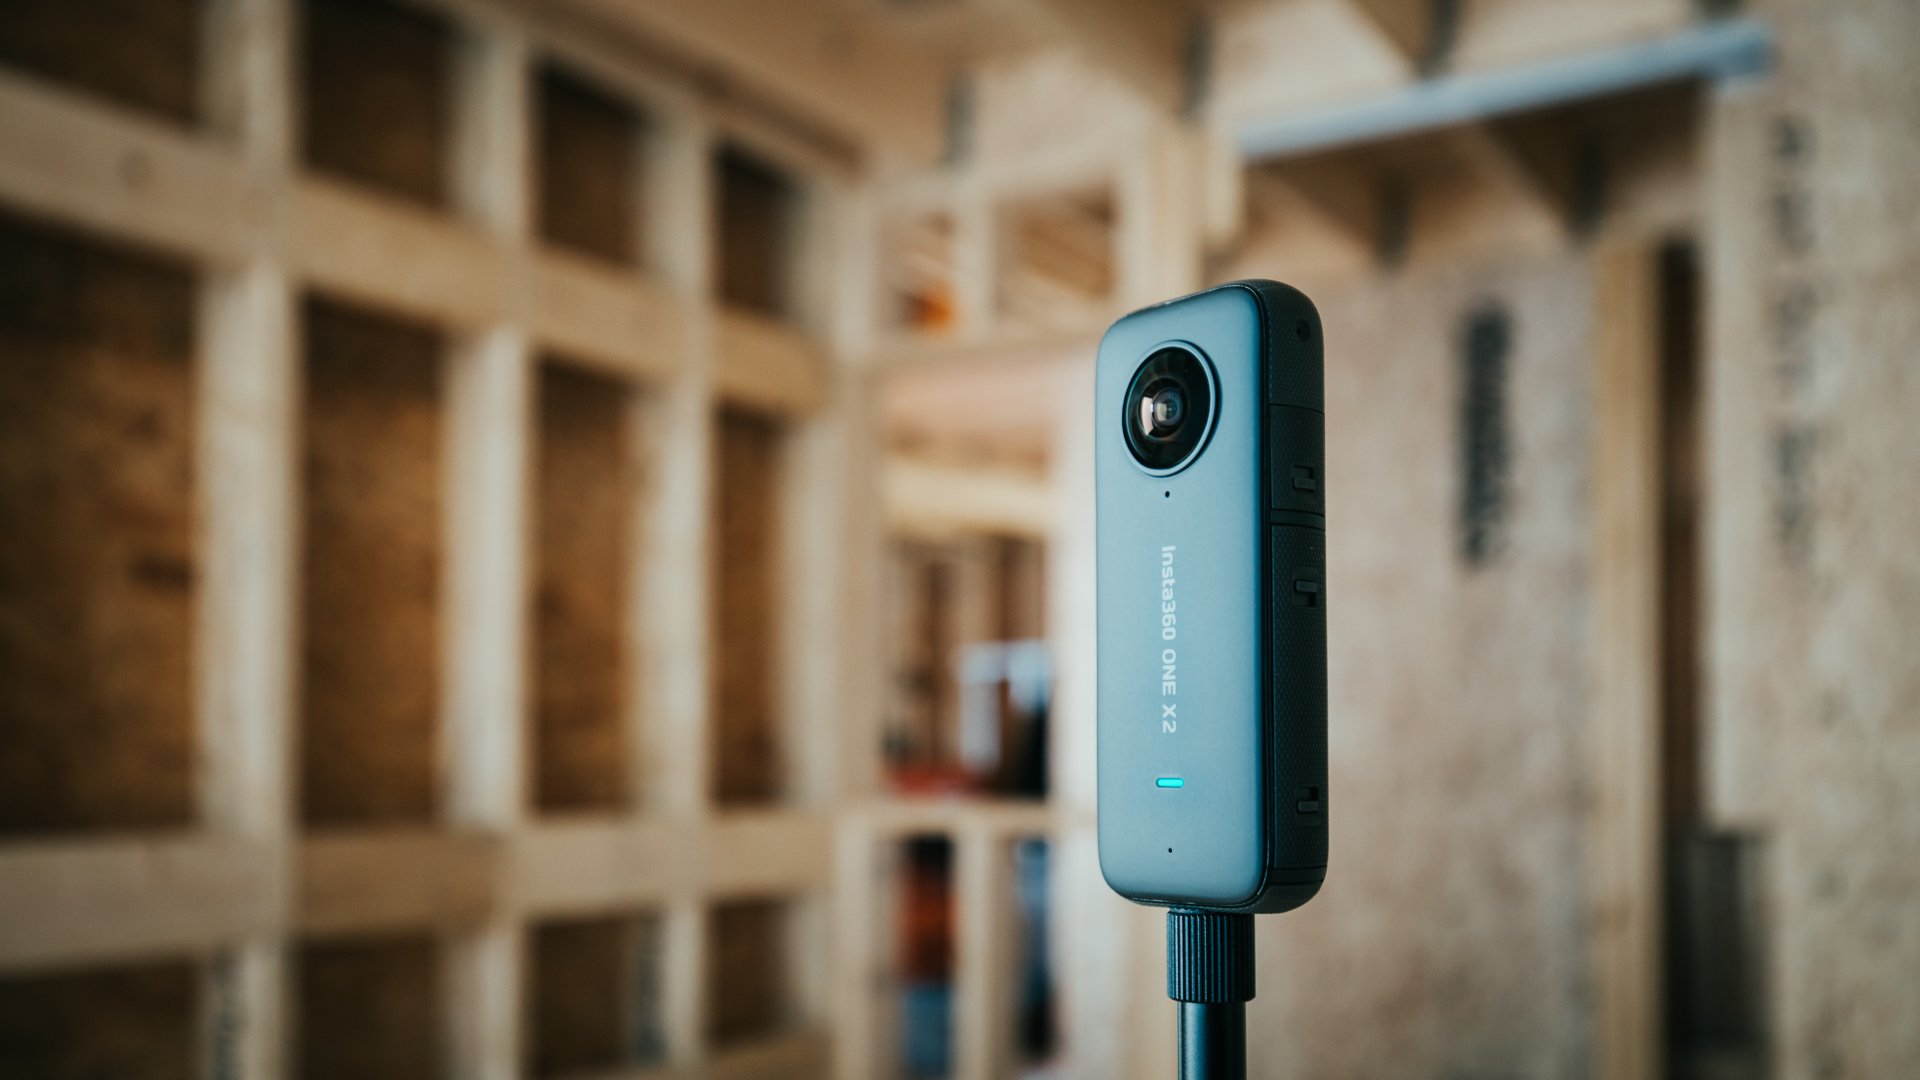
I recently added a 360 camera to my kit, the Insta360 OneX2 can be set up in the center of a space, connected to my iPad and in a few seconds I can record of construction progress for an entire room. It’s been a huge timesaver. I’ve also been using it to record memos as I’m walking through a space and, because the videos can be recomposed later in post, I use it to view areas I may have missed during my visit or export them to send to the client for discussion and general progress updates.

For aerial photography, terrain mapping, inspecting hard to reach places, and social posts I like having a drone with me. I still use the Gen 1 Mavic Pro from DJI, but if I were buying new today, I’d opt for the new Mavic Mini for its (even) smaller form factor and because it includes a controller. My current setup needs both a dedicated controller and an iPhone connection to fly.

Photos and video are an invaluable resource and I’ll often refer back to them as I’m writing my field report, or reviewing payment requisitions to verify the stage of completion of the work. I’m always glad to have a visual reminder of everything behind a wall finish - blocking, plumbing, gas lines - once it’s covered up.

Tablet/laptop

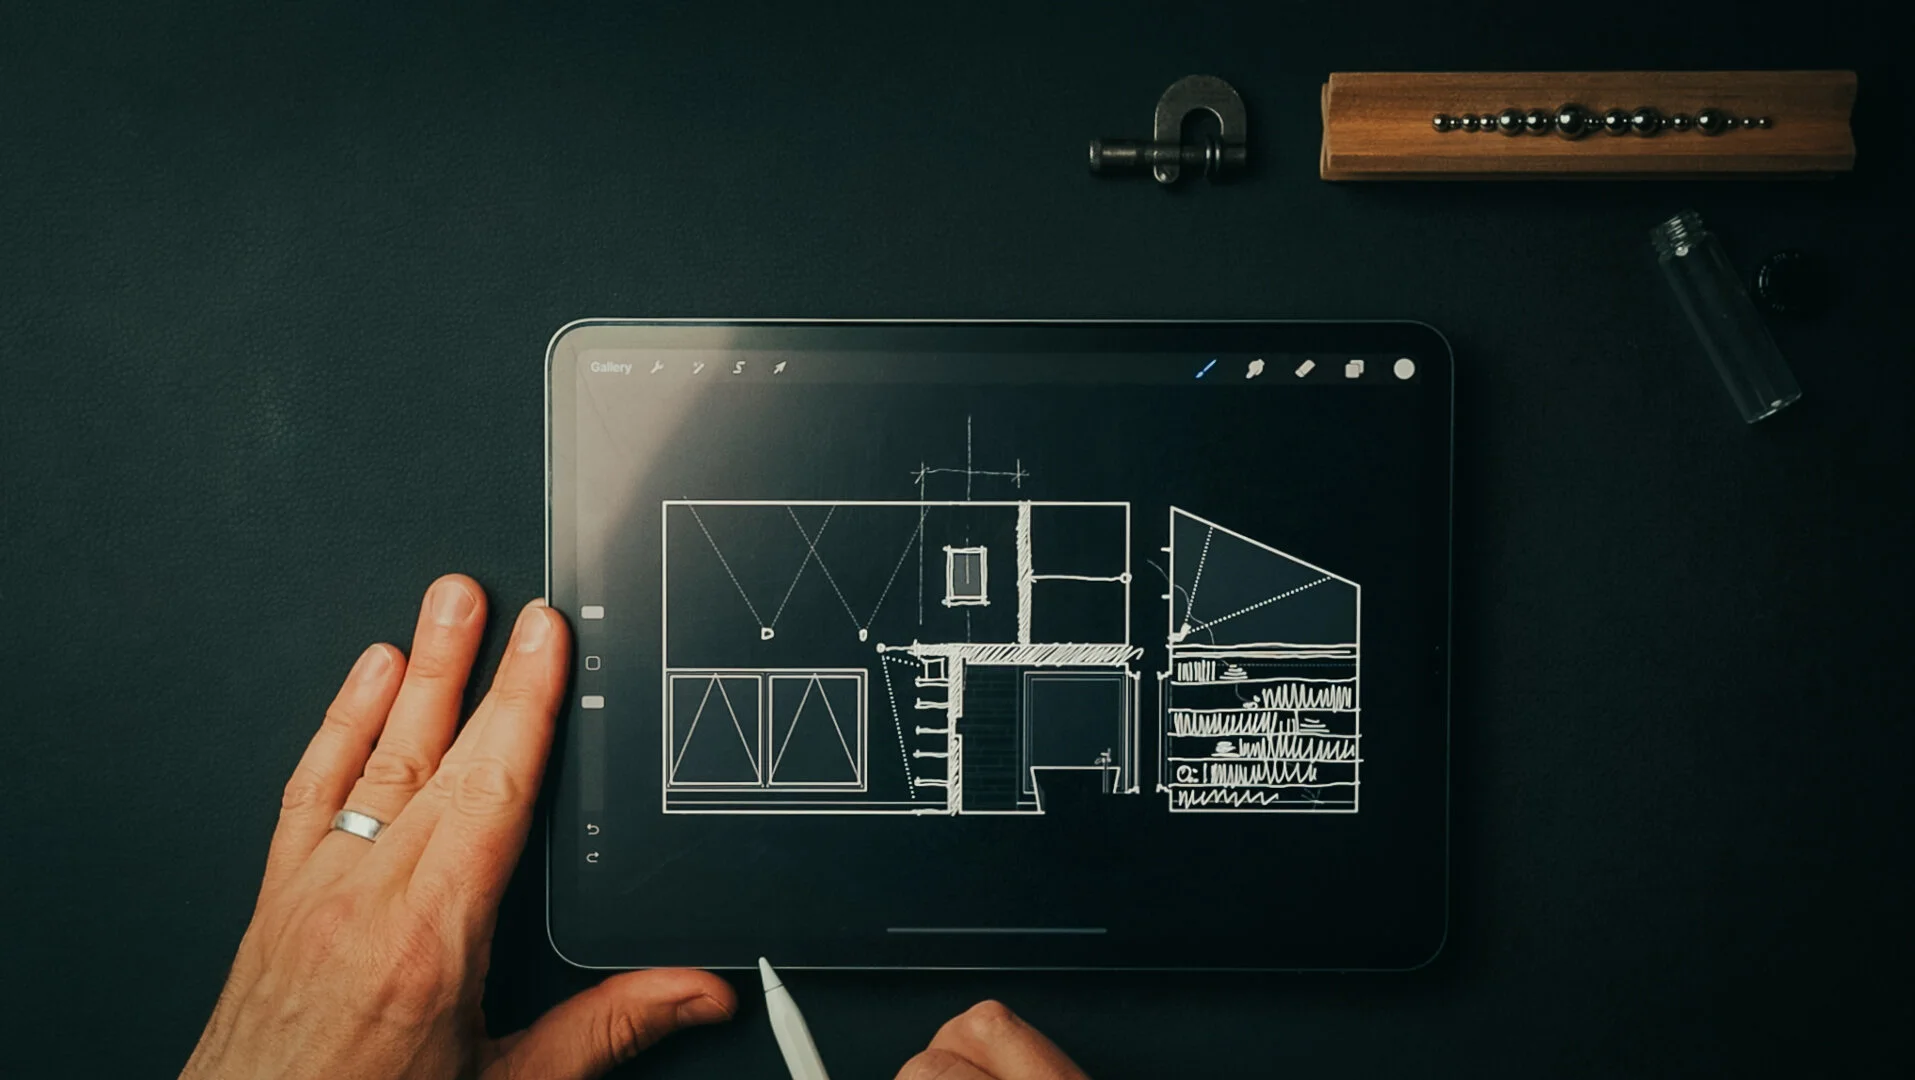
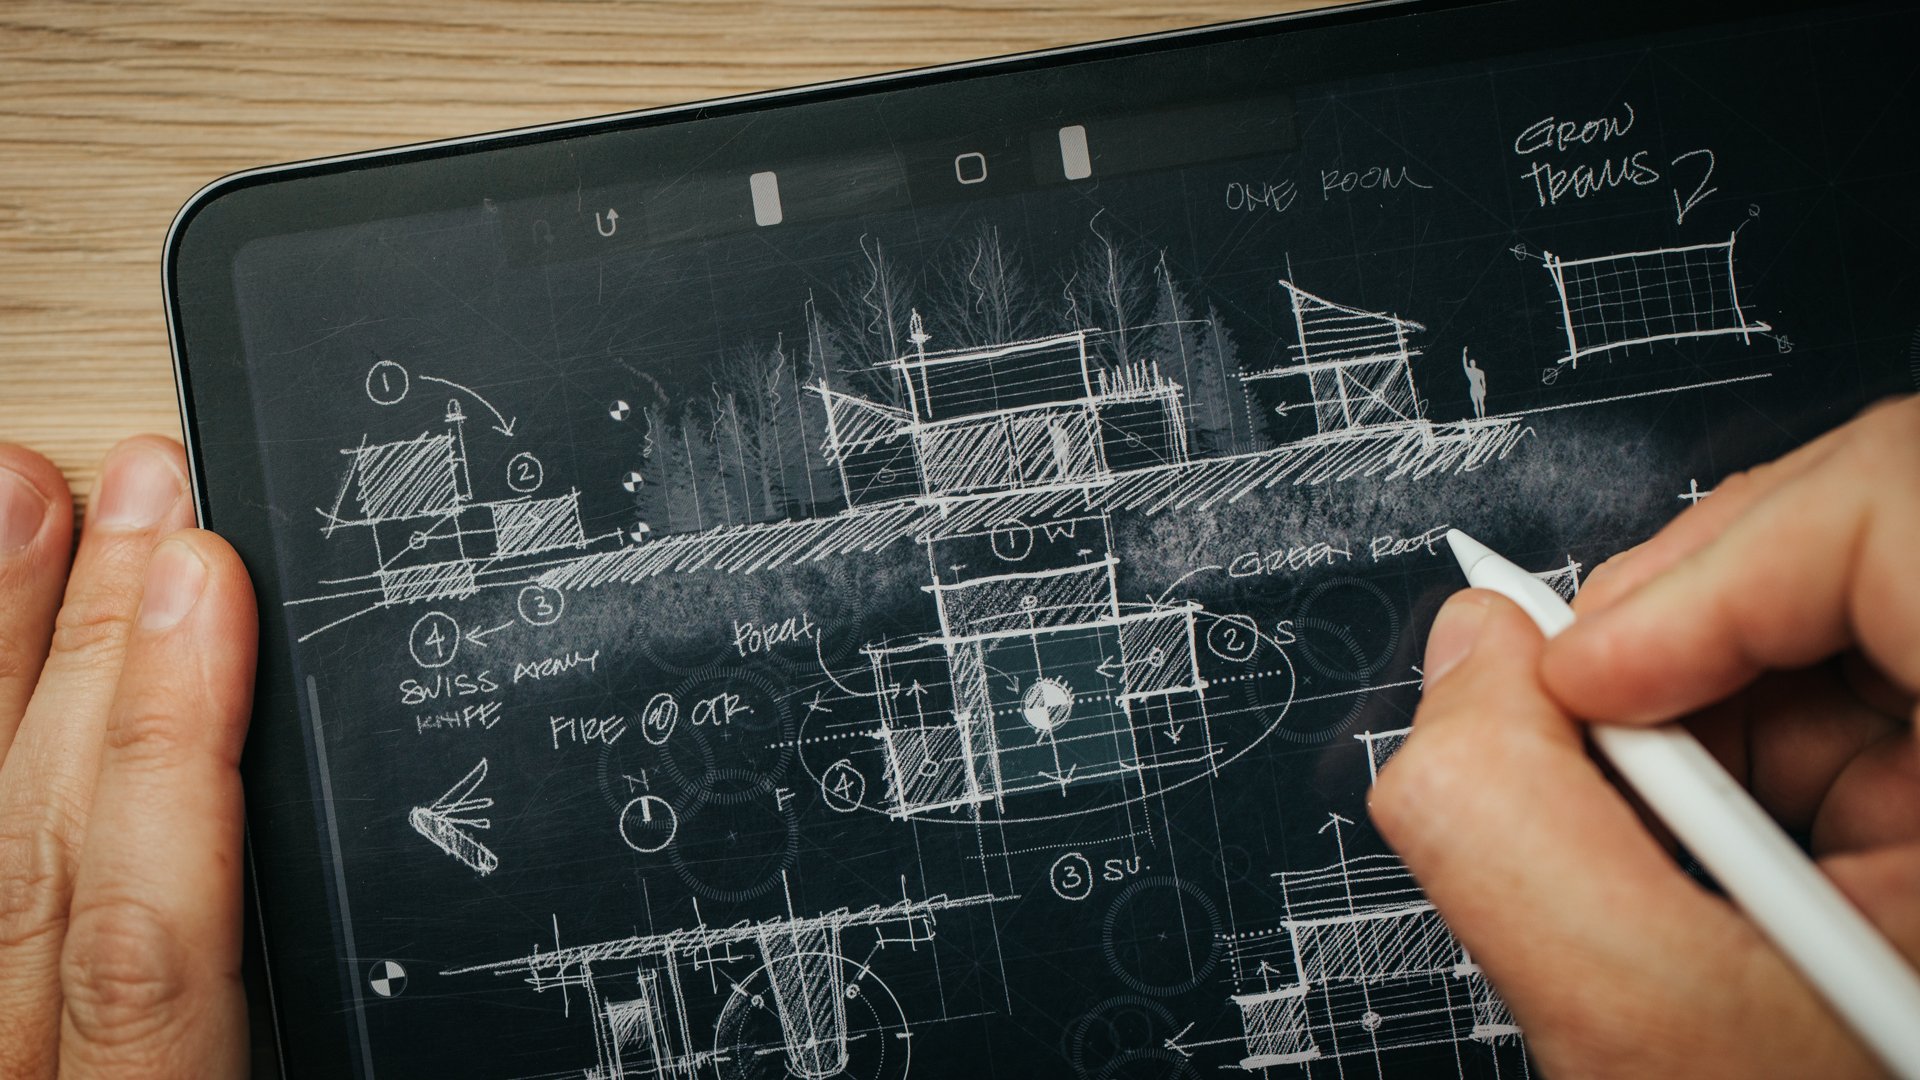
Inside the padded back panel is a sleeve that fits up to a 15” laptop, which I’ll usually bring for longer trips ( I use the 14-inch MacBook Pro ). For site visits, the 11-inch iPad Pro (+ Apple Pencil) serves as my daily driver. Most often I’m using the camera and Procreate to work through details in real-time on-site, or working through the meeting checklists in Notion and, of course, I keep all the updated drawings, specs and schedules there too. It’s impressive just how much space the iPad has actually freed up in my bag.

Tote

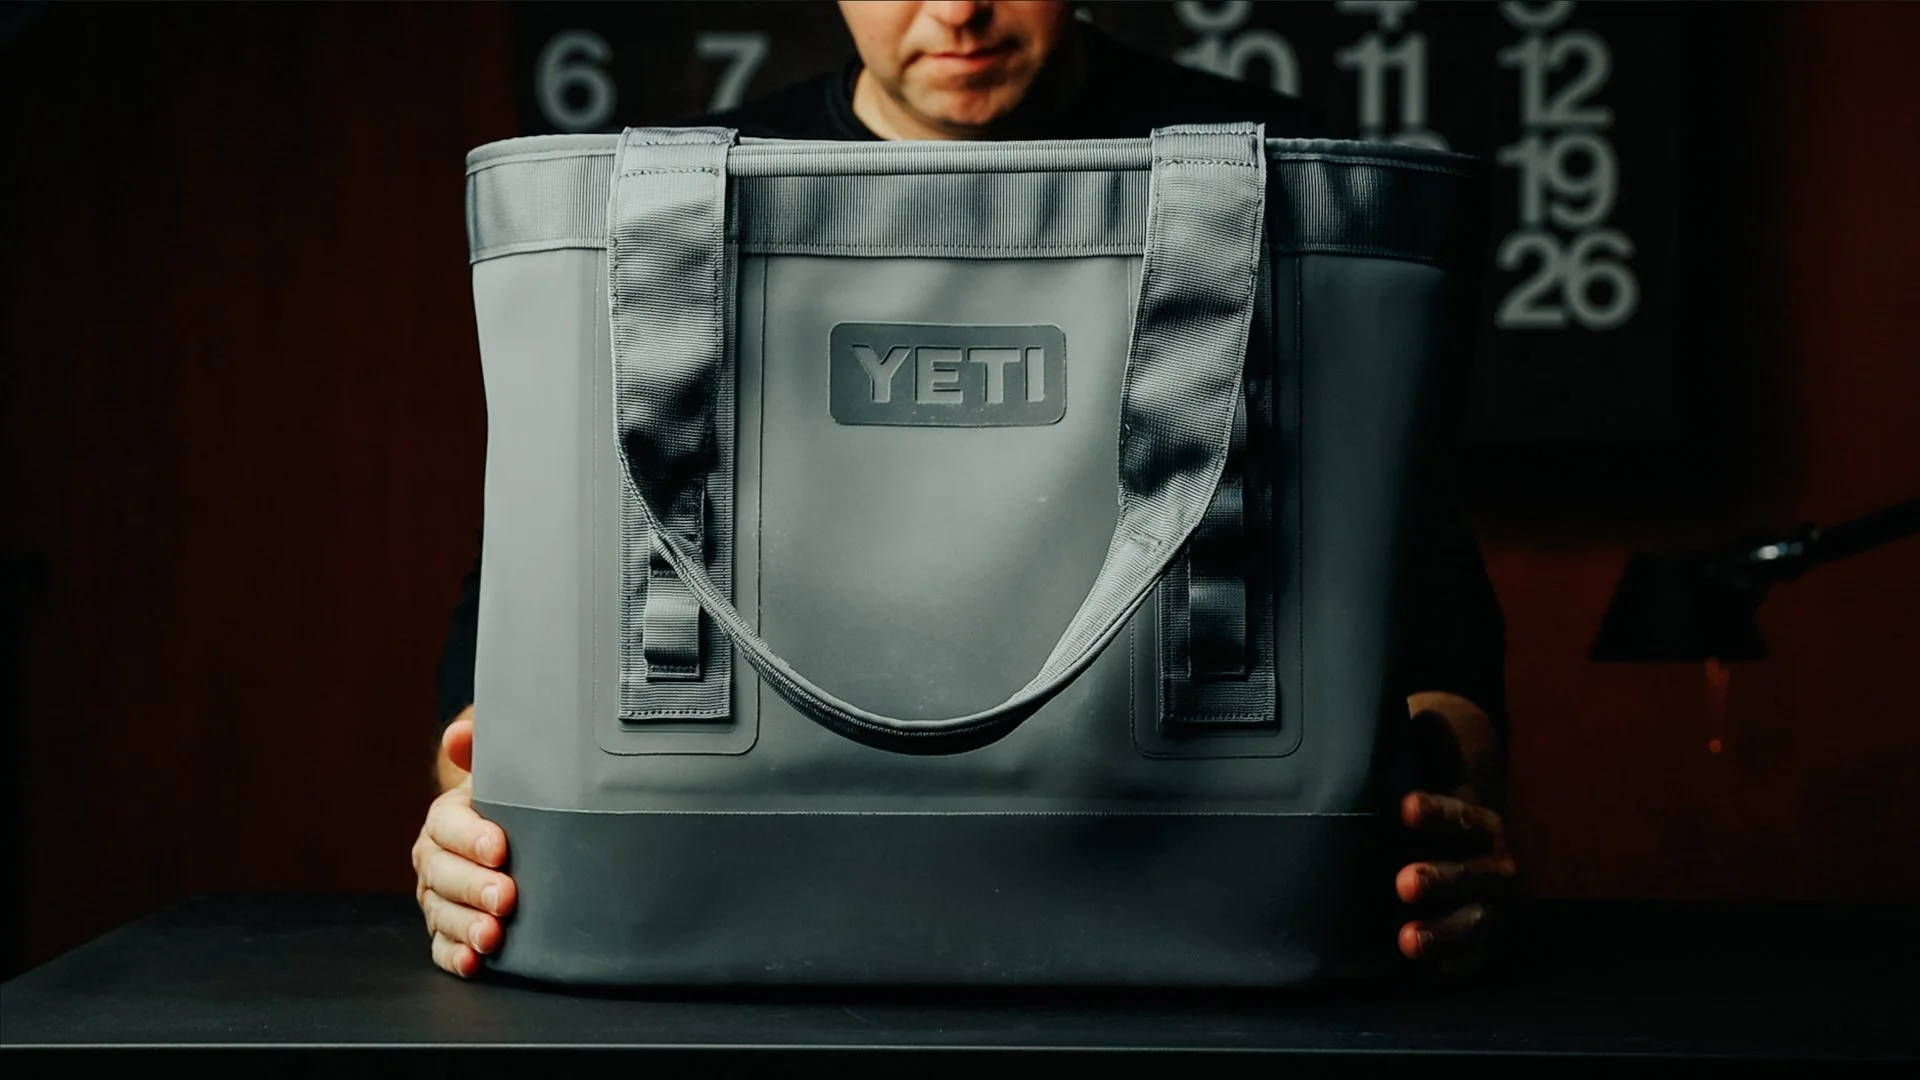
The tote bag I’m using is the Yeti Camino 35 and it’s a massive upgrade from the old LL Bean canvas bag I had been using. The large compartment has a zippered pocket on each side and two pop-out pockets at each end. Similar to the camera bag, I like the organization this affords. The molded EVA bottom stands on its own so it’s easy to load and unload and the puncture resistant shell is ultra-rugged and, because it’s completely waterproof, I can hose it out after use. When I’m camping, I can use it to haul water from a stream and the intermediate cross bars gives you different carrying options which is especially nice with heavier loads. They’ve even thought of details like a closure hook to keep larger items contained.

I use this bag more than I ever thought I would. Most often I’m carrying heavy material samples, reference books or catalogs to and from the job site. It also holds my water bottle, my tripod and it’s especially useful when I’m doing work on undeveloped sites holding my 100’ tape measure, flagging and reference documents. Its’ utility extends beyond the job site: I use it for car camping, the beach, and kayaking trips too and, the size perfectly complements my backpack giving me just a little additional overflow space.

It comes with a hefty price tag ($150) though, so you may want to mark it as your own. I made a little velcro-backed nameplate which I cut out of a scrap piece of zinc and mounted a custom sticker to for mine (see the video for details).

EDC (everyday carry) + PERSONAL ITEMS

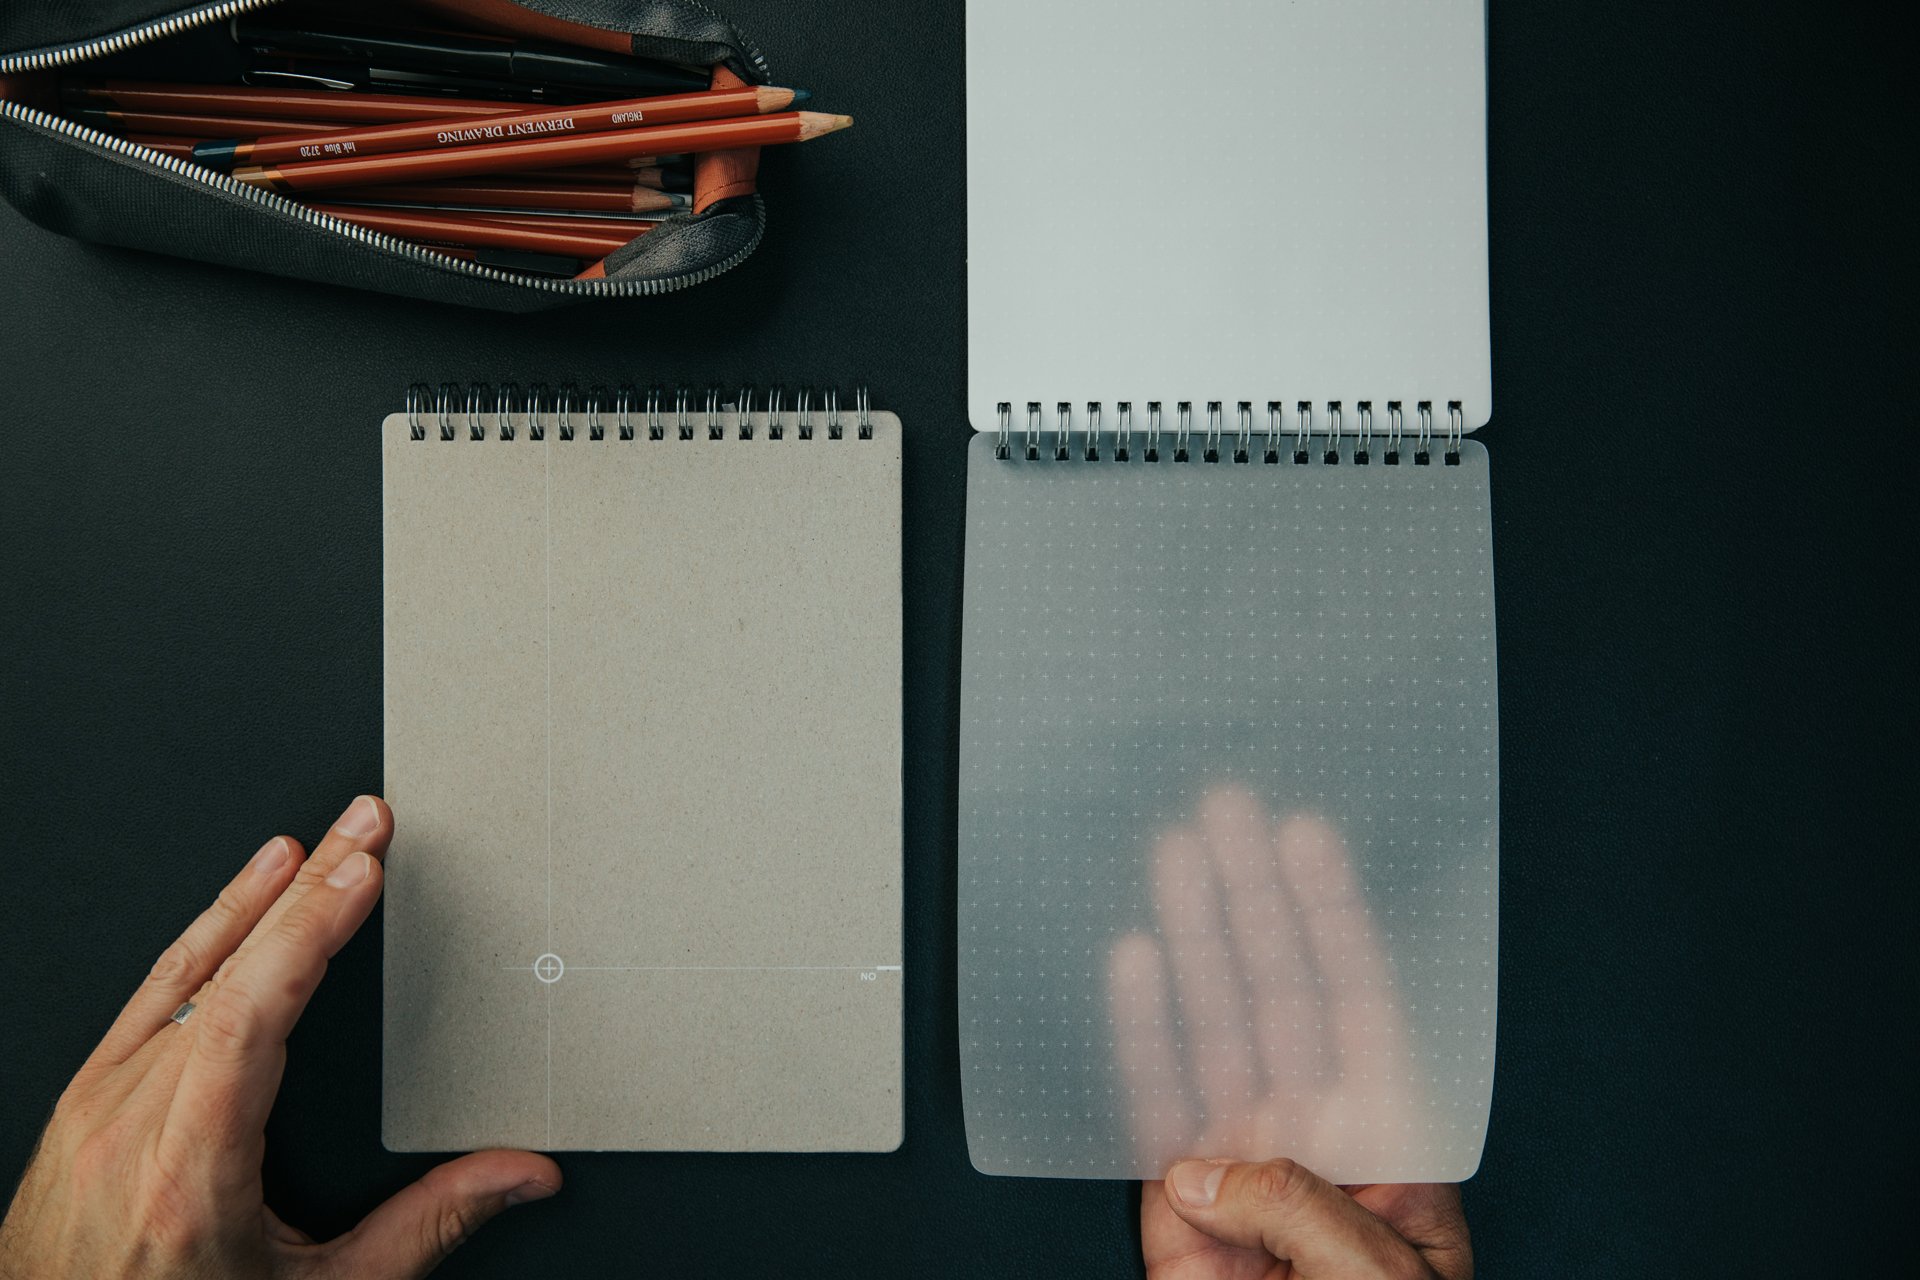
Scattered throughout the bag are my everyday carry items. In the translucent pouch on the back flap, I always carry a sketchbook with me. Currently it’s the TRACE sketchbook with a subtle white reticle on 90# vellum. The translucent pages are great for iterating ideas and take ink, pencil, even Copic markers without bleeding. I also use the BLANK Sketchbook with the subtle dot grid, debossed cover + elastic closure. If I’m traveling and unplugged, I tend to prefer analog sketching to digital and it serves as a travel diary.

For site visits I’ll always bring a 25’ tape measure and a roll of painters tape. If it’s early in the design process I’ll also bring a 100 tape and surveyor’s flagging. I use them for checking dimensions, confirming layouts and marking areas that need follow-up. If I’m meeting with a client, taping out a seating arrangement on the floor or testing various shelving heights or TV sizes can be immensely helpful. You’ll notice in the video that I printed up a few sheets of stickers with my business name on them and I use them to tag my gear. This avoids disputes with popular site tools (like tape measures) and ensures all my things land back in my bag at the end of the visit.

To keep things connected and charged I have a 30000 mAh solar battery charger with ports for all my devices, and a tech pouch to keep cables organized. The SD card case by Pelican helps me stay organized too, when a card is full I put it in the case upside down so I don’t overwrite it.

The bag has a tiny pouch for SD cards, but I prefer to keep mine in a Pelican Case so I’ve repurposed it to hold an Apple AirTag. My iPhone is set to immediately alert me when I wander too far from the bag, or someone walks off with it.

EDC Links:

  1. Braun Watch - I replaced the band with a rubberized one.

  2. Bellroy Wallet - the magnetic closure is fidget-friendly

  3. Northwall Multitool / Key - Box opener, prying tool, screwdriver. I use this frequently, it’s tiny and TSA compliant.

  4. Coast PX15R Flashlight - Fits the tactical vibe of the bag and it’s rechargeable. High power, focuses between flood and spot, + clip.

  5. Kuru Toga .5mm Mechanical Pencil + Lead

  6. Tombow Click Eraser - for precision erasing

  7. Apple AirTag - cheap insurance to keep track of your bags + valuables.

  8. Vintage H. Chapin & Son #12 Boxwood Folding Ruler

  9. Bellroy Pencil Case - More details on everything in my sketching kit here.

  10. Derwent Color Pencils

  11. iPhone 13 mini + MagSafe Leather Case

Mentioned, not pictured:

Some of the links in this post are affiliate links. Clicking on them and purchasing costs you nothing extra, but I receive a small commission which helps support my work on YouTube. Thank you!

Longhouse Kitchen Refresh - Before + After

Mixing high and low finishes in our simple modern kitchen renovation, we created a refined, luxe style on a modest budget. In part two of the video series we set to work demolishing the existing finishes in our kitchen and begin the makeover process. See the before and after transformation in the video; for the finishes, materials, and details, keep reading.

Read More

Revising + Updating the Drawing Set

A recent site visit + client request sets in motion a process every architect is familiar with: redesign + revisions. This is my process for solving real-world architectural problems, from sketching to updating the drawings and documents.

Revisions begin by clearly defining the problem and constraints governing the redesign. All design benefits from constraints, without them the possibilities are limitless. As we’re in construction the restrictions are numerous: there are budgetary, esthetic, physical, legal, and functional considerations. And, of course client preference is chief among them. I’ll often work through solutions that are less than optimal to illustrate shortcomings and to help move the design process forward. Below are a few examples of the initial solutions I developed.

Sketching Solutions

Sketching Solutions

Material Palette for inspiration

Material Palette for inspiration

A ladder clearly takes up the least space in the room, but it’s also the most difficult means of accessing the loft space. As my clients imagined cleaning it and bringing books to and from it, the use cases narrowed. Even though it may be possible to recapture extra space in a home, if it’s not useful or easily accessible, the cost-benefit is questionable.

As we worked through the options, this need for book storage suggested a new opportunity. By shifting the pocket door entry to the north and creating an alcove for the books on the main level we solved a few problems at once. The books found a natural home within arms’ reach and this singular, sweeping gesture on the south wall of the room also created a soffit above for display, increasing the perceived volume of the room and it allowed us to add a small eyebrow window to let light in from above. The soffit and shelf repeated a motif we had used elsewhere on the interiors whereby we nest smaller volumes within larger volumes of space.

Idea becomes sketch. Sketch becomes presentation drawing. Presentation drawing becomes construction drawing. And now, we build!

Outpost Updates - July 2023

To see all the latest progress + the current interior design iteration check out the links below:

Door Jamb Head Reveal Detail

Door Jamb + Base Reveal Detail

Field Report: Framing the Island Outpost

The Outpost project has entered the rough framing phase. This is the point where that initial sketch of an idea is rendered in physical form. For an architect, it's probably the most exciting part of construction and it's taken us many months to get here. Site and foundation work are time consuming and embody a lot of effort, but progress is often slow and much of the work remains hidden in the finished home. By contrast, framing moves quickly and there's much to coordinate between the trades: plumbers, electricians and mechanical subs.

The culture of HGTV has tricked us all into believing that construction happens in the space of a 30-minute show segment. But custom design + construction takes time to complete. And, custom construction on an island takes much longer (I'm learning). That's because building on an island is subject to an entirely different set of rules.

All things being equal, given the choice between plentiful, profitable work on the mainland and work on an island, most contractors have been choosing the work that's easier to access and execute. That's not something I had fully anticipated at the outset of construction and it's proving a difficult problem to solve. The building boom here in Maine has caused a significant labor shortage and that's hindered our ability to secure subcontractors willing to make the journey out to our remote site.

There are no hardware stores, or places to run to if you need an extra bag of concrete. Everything we build with comes from off-island and thus, bringing the necessary materials to the island requires a special weather window and, if it's a load delivered by barge, the right set of tides to land and leave the beach. Winter wind and heavy seas have conspired against us more than a few times too.

The work continues though and I'm thankful for the dedicated crew acting as my hands in the field to realize these ideas in spite of the wind and weather. So too, for generous, supportive clients - dear friends by now - who patiently watch as their home takes shape. To navigate these opposing forces and turn them to your advantage takes skill, hard work and the work of many. And, perhaps that's the reason the creative satisfaction in the end is so great.

My sincere thanks for watching and following along. It really is as much fun as it looks!

South end, guest bedroom looking north

Drive approach looking southeast - Feb. ‘21

North end, entry looking south

Western approach, looking northeast

Southwest end, looking northeast

Drive approach - March ‘21

Master suite looking northeast

View from entry looking east

Living space, looking north toward (future) kitchen

Architect vs. Engineer : Design Meeting

A structural engineer is a part of the design team for all my residential work in the studio. In this video you'll join me for the kick-off meeting with my engineer as we begin developing the structural design for the Outpost project. You’ll see how we choose a foundation strategy, work through framing + detail ideas, and understand how lateral loads are transferred and how they affect the materials we choose to build with. The professional tug-of-war between engineer and architect isn't adversarial, rather it's collaborative and makes for a better, more efficient project.

The most interesting part of our dialogue begins around minute eighteen where I ask Albert to comment on one of the most common objections I hear from contractors in the field: "This design is way over-engineered." His answer illuminates how a structural engineer can complement the architectural design process in ways you may not have anticipated.

If you enjoy these videos, you can support 30X40’s work on YouTube by investing in a course, a toolkit or a digital tool. Many thanks!

The Dogtrot House Plan Origin Story

In this video I discuss the origins of the dogtrot as a plan archetype, its history and how it came to be. Although commonly thought of as a Southern building type early settlers of Pennsylvania and New Jersey, the Swedes and Finns brought with them the "pair cottage" from Northern Europe. This shaped the early dogtrots in the United States. It was widely adopted in the South because is offered an ingenious method of passively cooling the home. This is the first of a three-part video series. In part 2 I discuss the design process for the modern dogtrot floor plans I've developed which were inspired by these early prototypes.

Industrial Style - Metal Mesh for the Home

In this video I discuss how to put metal mesh to work in your home. I'm always searching for new materials to use in my residential work. I’m particularly drawn to adapting simple, utilitarian, industrial materials for use in the home. Industrial metal mesh is an excellent example of this and one that deserves consideration for both interior and exterior use. In the video I review the different types of mesh available from bar grating and metal fabrics to screening and wire meshes. I discuss the substrates and specific applications. Each is illustrated with images depicting their use.

Phased Construction for Residential Construction

In this video I discuss the advantages and disadvantages of phasing your home construction project. Phasing intentionally and selectively plans for and delays certain aspects of a home's construction. While it saves money up front, it usually costs more in the long-term. The advantages of phased construction are:

  1. Lower Initial Investment - it takes less overall to get started and can spread the costs of a larger project out over time.
  2. Shorter Construction Time - the smaller scope of work nets a reduced (initial) construction timeline.
  3. Experience - living in a partially completed home while its under construction not only offsets living costs but allows you to truly experience the size and scale of the home before undertaking future phases.
  4. Design Changes - phasing opens the door to pivoting design ideas over time. You may decide you don't want the detached guest house planned in phase two, rather you want it incorporated into the home as an addition.

The disadvantages are:

  1. Complexity - overall phased construction is more complex.
  2. Longer Total Construction Time - even though the initial construction sequence is shorter it will take longer to realize the entire project.
  3. Higher Total Cost - because of the longer time frames involved, financing costs, higher design fees and the extra mobilization costs, phased projects are inherently more costly to undertake.

I discuss the details of financing concerns, planning issues, sequencing, phasing plans, staging, scheduling, and living with the mess of construction.

Phasing is an overall more complex process, but it makes sense in certain cases, the video explains those cases supported with lots of visuals.

Warmboard Radiant Panel - An Architect's Review

In this video I review a new flooring product we've been using - Warmboard. Reasons to Consider Using Warmboard:

  • Low mass radiant flooring option - fewer BTUs to get to operating temperature, faster response times
  • Highly conductive aluminum face on subfloor - lower boiler temps, lower energy bills, geothermal/solar compatibility
  • Fast install times - structural subfloor + heat tubing layout all-in-one
  • Aluminum sheet diffuses heat along top surface of subfloor for even heating
  • Compatible with multiple flooring types can be overlaid - hardwood, tile + carpet
  • Zoning + panel layout design included in the price - assembly arrives with a numbered diagram for installation
  • Tubing is visible on top face of subfloor - minimizes tubing penetrations via errant fasteners during floor finish application.
  • 20% recycled content in alum. facing, OSB + Plywood panels are efficient use of natural resources
  • Warmboard R (retrofit) can be used in renovation projects where floor build-up and thickness is a concern

Siting Your Home - An Architect's Tutorial

There's a lot of 'ground' to cover when talking about choosing the ideal location to place your home and given just how individual each site is it would make for a very long video.  So, I've outlined my process in more detail here to help guide you from purchase point to design concept.  I'd love to hear from you, let me know if this helped in any way and as always you can send your questions to eric@thirtybyforty.com

YOUR SITE

This is where it all begins.  More often than not, the site is a strong generator of building form and orientation, as well as material and color for my buildings, so this step is a critical one.  The site is the genius loci for your project, wine makers call it terroir and understand that the site is the key to the ultimate flavor of wine.  The site is really important to me and it should be to you too.  It can be the raw land you’ve purchased, an empty building lot in a subdivision, the street on which you bought a row house, or even the floor of a warehouse you purchased.

b_siteananalysis_2
b_siteananalysis_2

Sites vary widely in their scale and reach but they all share some basic characteristics.  The site will have topography, it will have utilities and if it’s remote enough and doesn’t have utilities then you’ll need to plan how you’ll get things like power, phone, cable, water supply and how you’ll address things like sewage disposal.  Sites will all have access points and boundaries.  Depending on your particular situation it may have streams, forest, a significant tree, an orchard, lawn, a glacial erratic, wetlands, a lake or pond, even other structures and roadways.

More broadly, your site exists within a cultural context and a set of local building traditions.  If you’ve lived near your site for a long time, you’re probably aware of these.  If you’re new to the area observe your surroundings, read a little about the history of your area.  I always take clues from industrial or agrarian structures, which derive maximum benefit from minimal expenditure.  These structures plainly exhibit local know-how because their limited budgets require it.  Their choice of materials reflect local building norms and practice and while many may be in a state of disrepair, look more deeply for the origins of these selections.

DOCUMENT EVERYTHING

siteimpression
siteimpression

It’s important to document as much of this information as you can, within reason.  I begin by walking the site without anything in my hands.  This allows me to focus on important site features (and avoid tripping) without distraction.  I make mental notes of things that stand out, where the sun is, where the wind is coming from, views, sounds.  If the site is urban, this will entail walking the neighborhood, think of your site as everything within a 5-10 minute stroll.  If possible, visit the site at different times of the day, and at least once in the morning and once in the evening.  You’ll come away from these site walks knowing a lot more about the site and surrounding area than you had before.  Take photographs from a variety of vantage points.  This records the site pre-intervention and serves as a nostalgic record (think before-after photos).  Additionally, your building permit process or design review board may require them and you’ll reference them at various times during design as a source of inspiration.  Document all of this in a sketchbook, on your tablet, with a voice recorder, whatever way you choose.  I usually quickly sketch my impressions in a diagram, which is my way of visually hardwiring this information.  I find it easier to recall when I have to generate it by hand.

If your site has varied topography, sits on a hillside, near a stream or if it will be subject to stringent review by a design review or zoning board, you’ll probably need a survey.  There are basic surveys and there are boundary surveys.  The type you will require will depend on your specific situation, but more often than not you’ll only require a basic survey.  A boundary survey will be required when your deed doesn’t specifically outline the property lines or if there is some questionable division of your lot.  This isn’t a normal situation, but if you purchase this type of lot it will require deed research by a law clerk to determine historical land transfers, which, isn’t cheap.

If you do require a survey, contact a local professional land surveyor and ask how much a basic survey would cost.  Local surveyors are a great resource to tap and meeting one on your site can provide insights into lot history, neighbors, contractors and potential pitfalls regarding the local permitting process.   Be sure to pick their brains, their local knowledge is often invaluable.

TIP: if you’re looking to save money have the surveyor provide you with 2’ contour only in and around the area you’re considering building.  You can walk the site together and with some surveyor’s flagging map out an area together.  They can help you determine other site features you may have overlooked and decide whether you’ll need to locate them on the plan or not.

SURVEY BASICS

  • Reference Point
  • Property Lines
  • Other Structures
  • Flood Elevation
  • Driveways
  • Utilities
  • Contour/Topography
  • Significant Trees
  • Other Significant Features
  • Setbacks

REFERENCE POINT

Always have your surveyor set an elevation benchmark or reference point.  This is usually in the form of a nail set with orange flagging somewhere on site and tied back to their plan and noted as E.R.P. (Elevation Reference Point).

PROPERTY LINES

Have them locate the property lines per your deed.

OTHER STRUCTURES

Sheds, nearby houses, garages, barns, silos.

FLOOD ELEVATION

If you’ll be living in a flood plan, you’ll need this for insurance and the bank will require it for loans.

DRIVEWAYS

Existing, other access points.

UTILITIES

Power (overhead/buried), propane tanks, gas lines, cable, water, sewer.

CONTOUR

In surveyor-speak, this refers to the exact elevation and slope of the land.  Contour lines on a map connect points of similar elevation.  These lines are set at a specific interval depending on the scale of the map.  Many topographic navigation maps use a 20’ interval, with each line representing a 20’ difference in elevation from the adjacent line.  The closer the lines are together on the map, the steeper the site is and conversely, the farther apart the more flat the site is.  For your purposes, a 2’ interval should be sufficient.  If you’re very concerned with how closely your building will adhere to your site contour you may wish to have a 1’ interval mapped, but this will be twice as expensive as the 2’ option.

SIGNIFICANT TREES

If preserving trees are important to you, have him pick up the trees within that zone that are greater than 16” in diameter.

OTHER SIGNIFICANT FEATURES

Water bodies, fencing, stone walls, etc.

SETBACKS

If there are setbacks from waterlines, wetlands, easements or restricted areas ask them to locate those on the plan as well.  Always request a CAD file and PDF of their work.  This will help save on survey costs, which can add up quickly.  Survey costs in Maine as of publication date range between $3500-5000 for a basic survey around a building site with 2’ contours indicated, tied to the National Geodetic Vertical Datum (NGVD).

TIP: Google Earth is a great tool to see your site in context at a variety of scales. You may even find historical views and maps of your site as a layer within Google Earth.  Print out the most current view of your site and use it to document your findings, it’s a great way to conduct a no-cost site analysis and see your site from a different perspective.

A few other items to consider at this stage:

1) Deed: secure a copy of your deed if you haven’t already and review it to be sure there are no restrictions listed that would prevent you from doing what you’re proposing.  Pay particular attention to easements (number of structures allowed, utilities, view, access, etc.).  You’re legally bound to this document even if the town doesn’t have jurisdiction to enforce it.

2) Septic system: if your site doesn’t have access to a municipal sewer system you’ll need to hire a soils scientist to design a subsurface wastewater disposal system.  Basically a septic system.

3) Power: contact your local utility to verify the process and more importantly, the timeline, for getting power to your site.  If it’s far from the grid expect to pay between $10-$20 per foot to construct overhead primary power line.  Buried power line, as you’d expect, is more expensive and depends on site conditions (bedrock, streams, etc.)

site analysis
site analysis

DIAGRAM

Once you’ve compiled as much of the information above, add it to your SITE file folder. You'll use all of this information to diagram the site.  It need not be particularly good looking or graceful, it only needs to be useful.  This synthesis of information usually quite quickly highlights areas of the site to be developed and suggests areas to explore.  It may even result in design concepts.  The diagram at left led me to a design concept for the house which I proposed for this site based on the idea of a camera lens.  The gradation of light and view along with the existing site textures set in motion a particular thought process that led to this and other concepts for this property.  My video describes a more fluid way of looking at all of these technicalities together but in the end, the goal is to get to a diagram that clearly describes the limitations of the site which at the same time graphically represents the possibilities of the site.

As always, I'd love to hear your thoughts and questions about your site, please feel free to contact me.  Please subscribe to my YouTube channel  if you'd like to keep up with future workshops.